The cuvette, being pumped by a TEA nitrogen laser
(See the text for details.)
[A continuation of work reported on “TJIIRRS” page #11.]
The cuvette, being pumped by a TEA nitrogen laser
(See the text for details.)
(2013.0922)
This cuvette design centers around a 1/8" [3.25 mm] thick fused silica window that I purchased from “laserwolfer” on eBay. He often has these. (Try searching on the words silica window .) They cost less than $20 each, and they make it really easy to construct a cuvette.
The other thing you’ll need is a microscope slide; I use water-white ones, as they absorb less light than the usual pale-green ones. (With the high gain of most laser dyes this is not a large problem, but every little bit helps.) If you can afford a fused silica slide, or if you have some pieces of fused silica that you can use as side windows, so much the better: fs will reflect about 6%, and will provide more feedback for the dye. [Some people think that they are lasing without mirrors when they use a cuvette of this general sort, but if the sides are parallel to each other and perpendicular to the front, they happily serve as mirrors unless you tilt the cuvette. Sometimes, particularly if you are illuminating a short wide stripe of dye rather than a long narrow one, even tilting the cuvette is not enough.]
[Note: if you can’t get a thick fs window of the sort I used, you can go ahead and use a thin window or a piece of microscope slide; the only real difference is that you’ll have to figure out a way to align the side windows. Alternatively, you can deliberately misalign them, and use external mirrors.]
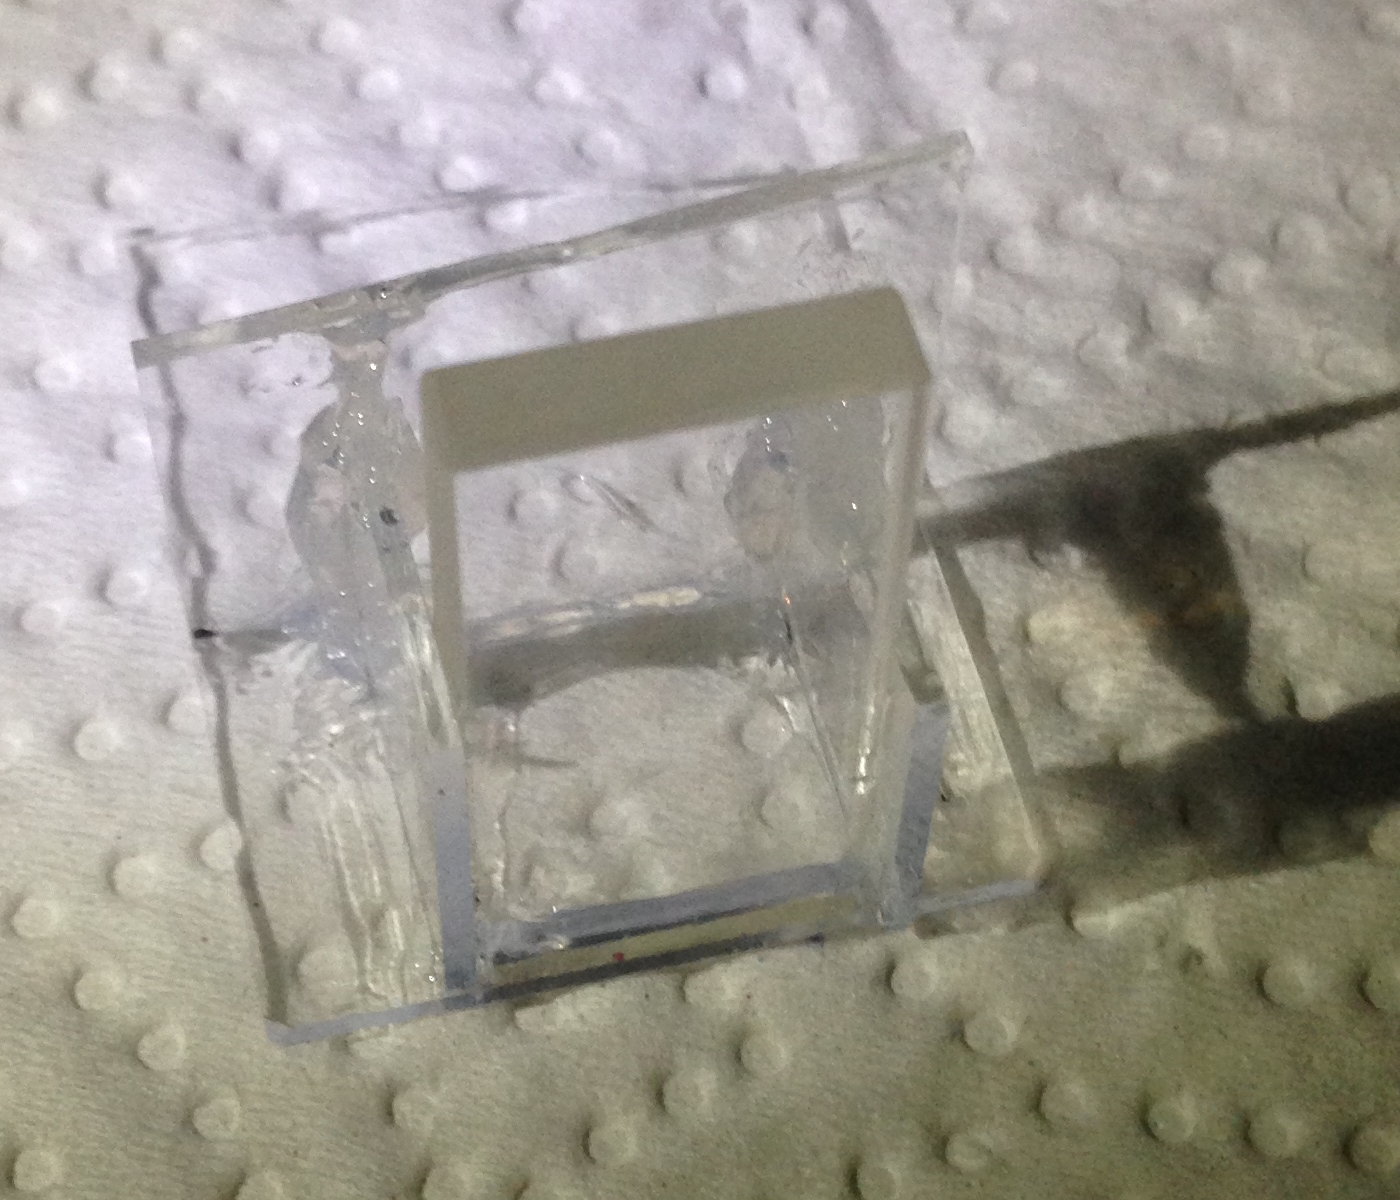
Here is a view of the parts of the cuvette:
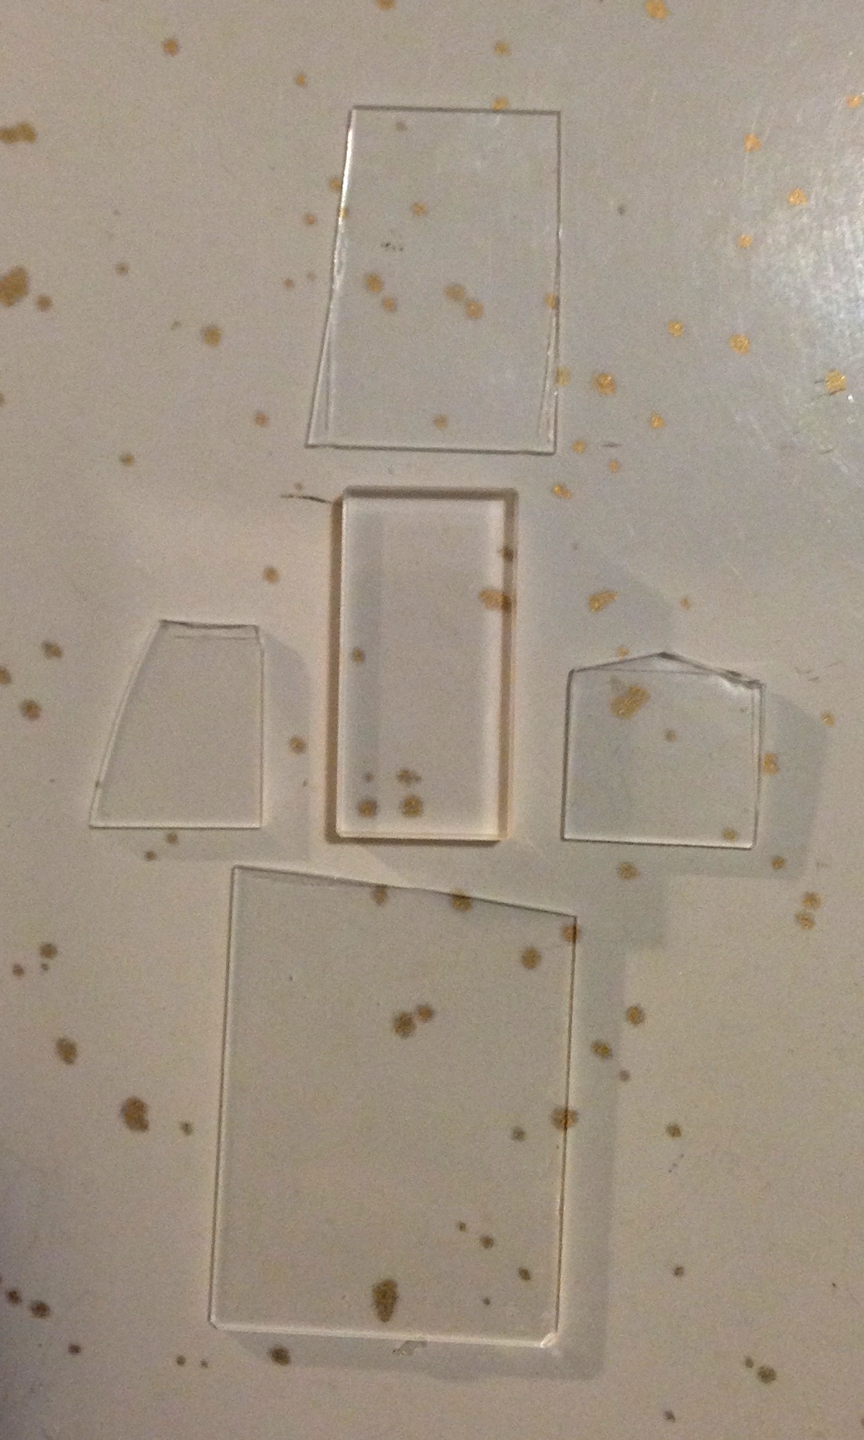
As you can see, I had a bit of trouble cutting the glass. I wetted it and then scribed it with the corner of a ceramic IC package; that mostly worked, but I guess some of the scribe lines were not quite deep enough. The important thing here is that one edge of each side window should be straight — it will be the bottom edge of the window, and you want it to make good contact with the base. (I was under an additional constraint because my microscope slide was one that I had used in a previous cuvette, and some parts of it were not clean enough to use for this one.)
Here is the front window, attached to the base with a minimal amount of silicone caulk:
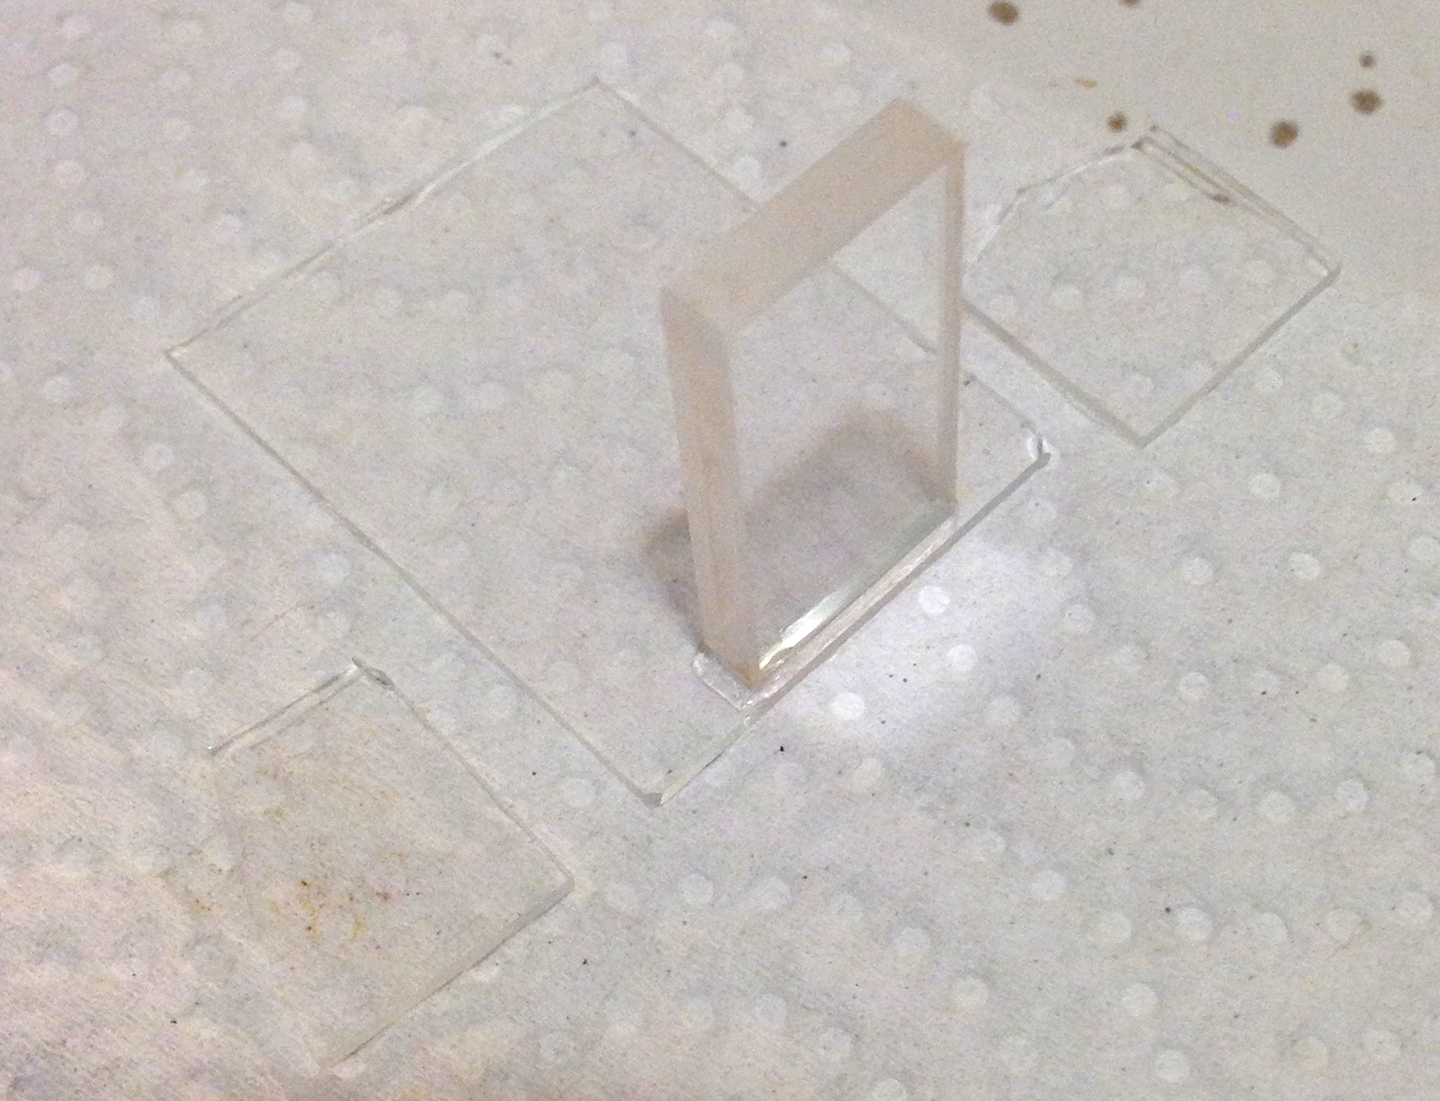
Because I expect to be using a TEA nitrogen laser to pump this cuvette, I have oriented the front window so that it is narrow. If you have a low-pressure nitrogen laser you may want to orient the window so that the front is wide.
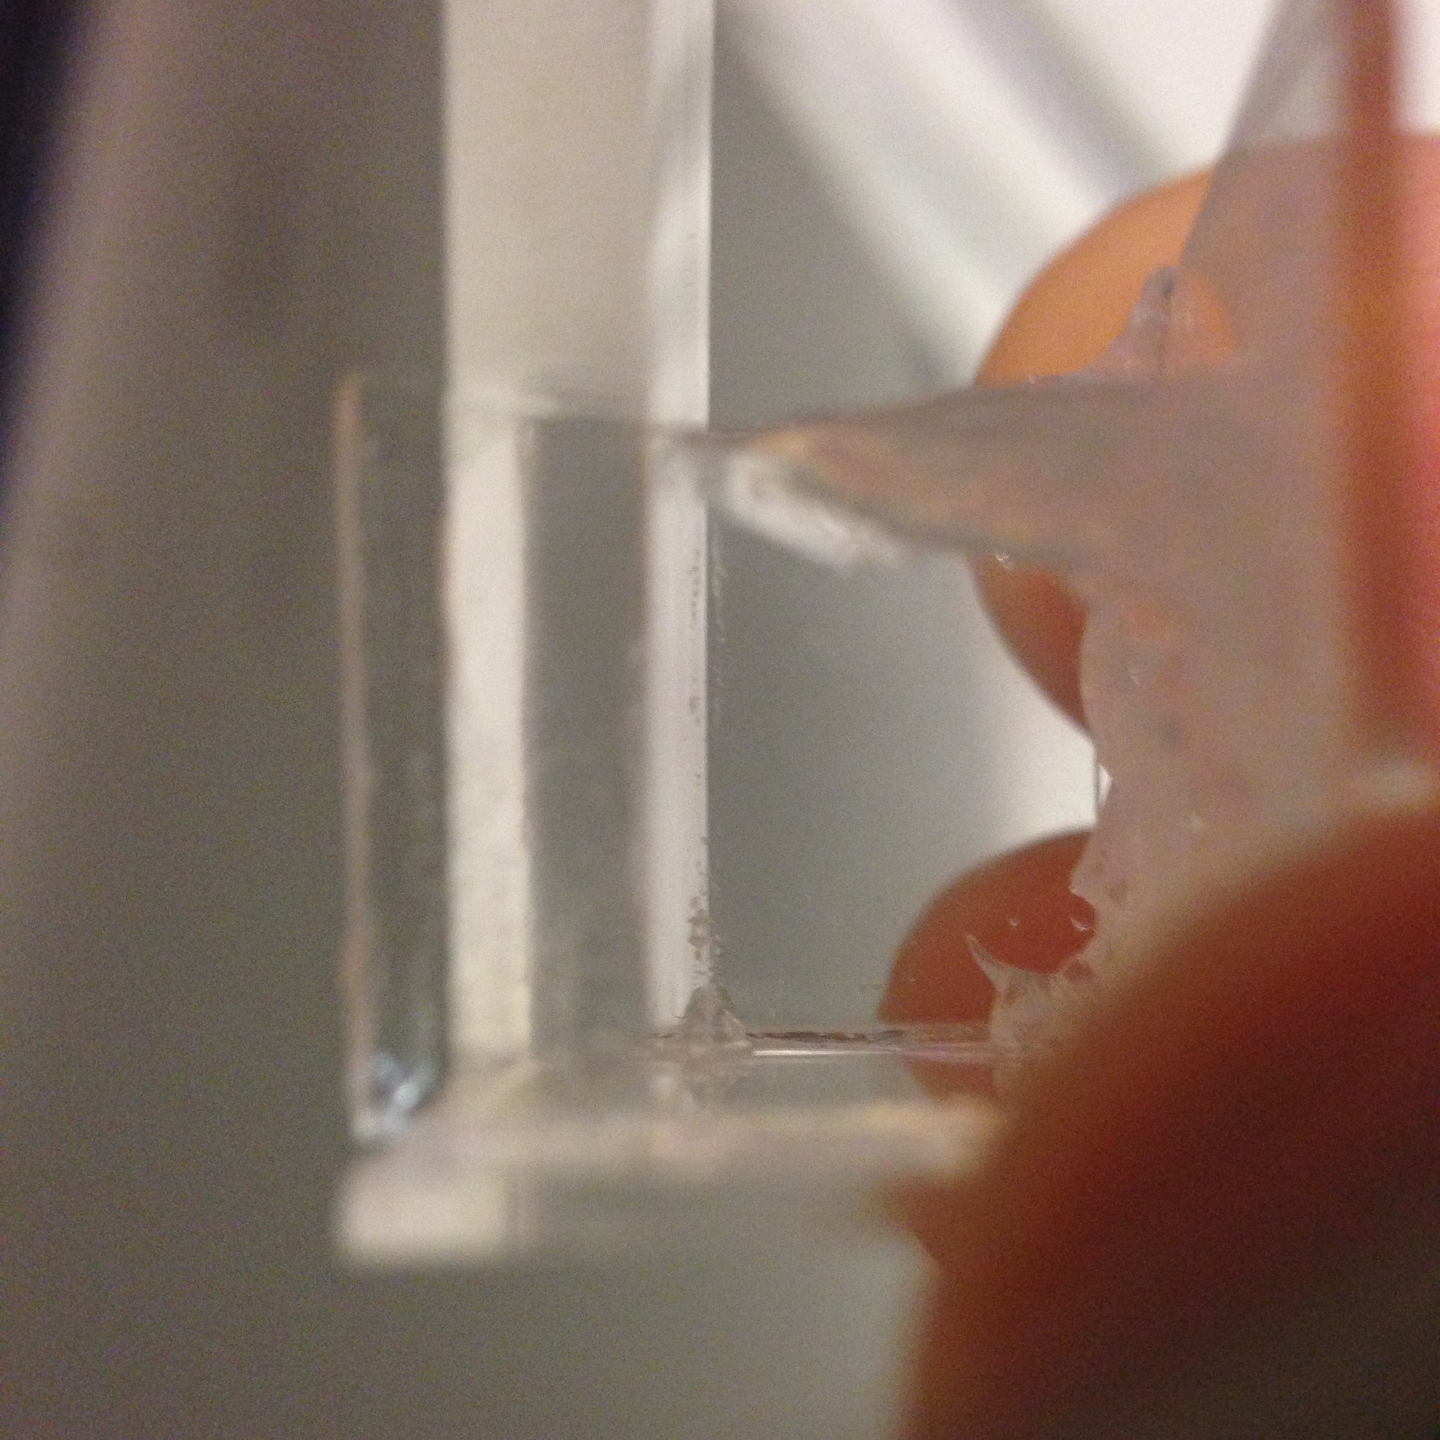
Here is a view of the underside. Please note the fact that you can see right through the base into the windows and the back wall. This indicates a clean and complete bond, which further indicates that the cuvette will not leak at its base. (Obviously, you need to be sure that the side and rear attachments are complete all the way up, so that it won’t leak there either.)
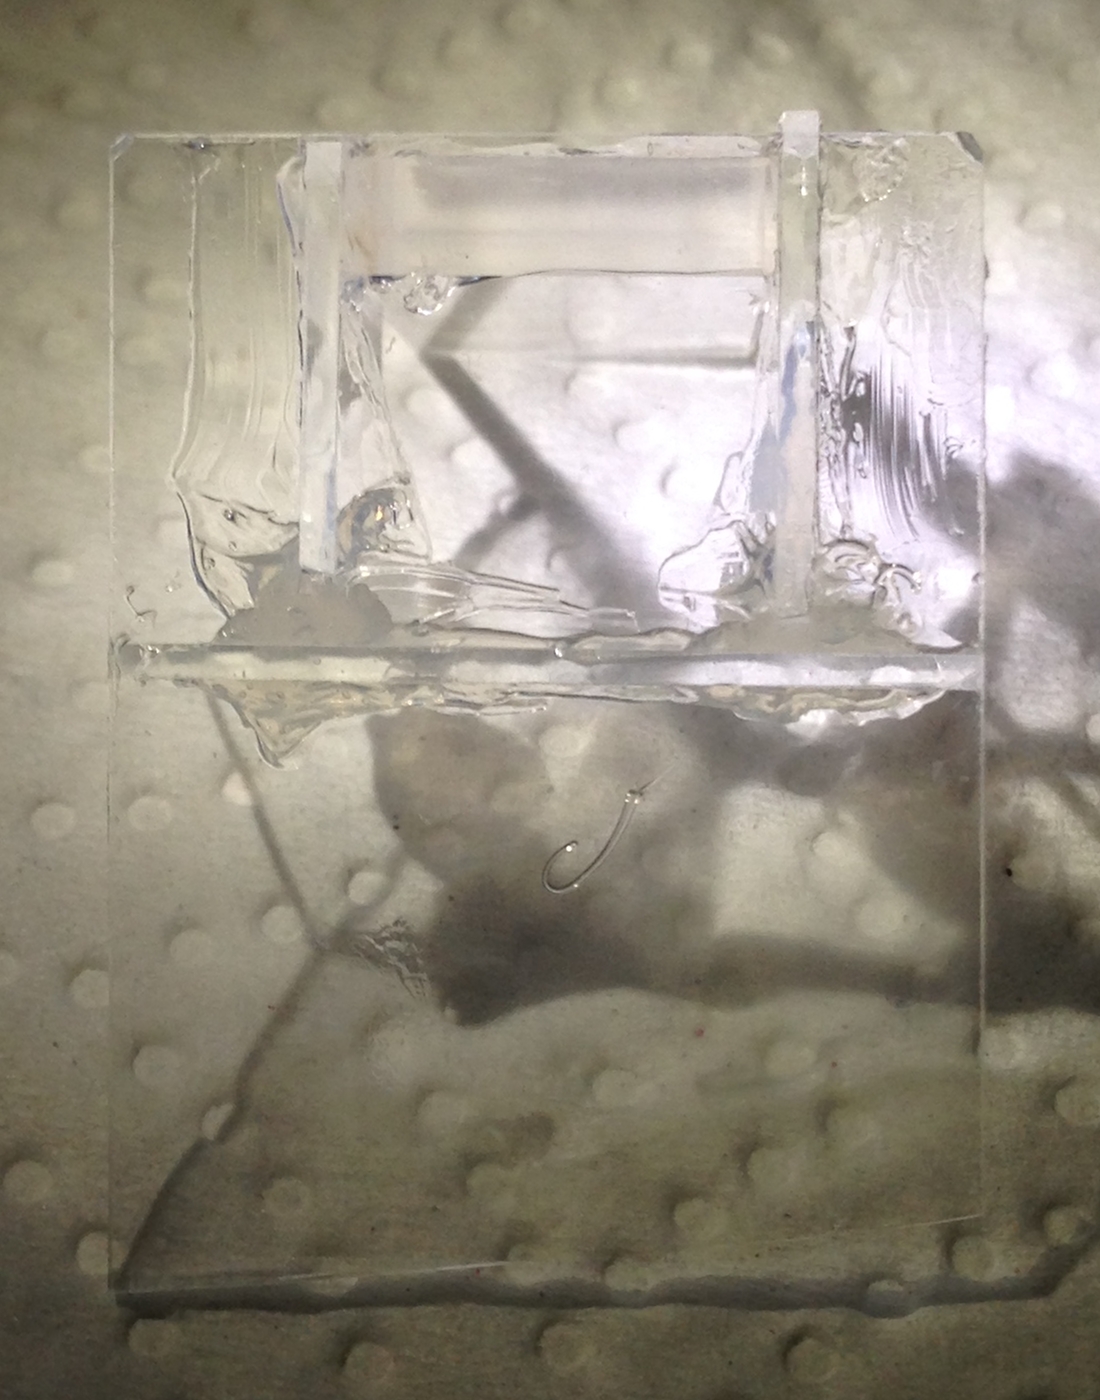
NOTE: It’s important to clean the glass surfaces well, and to use plain translucent caulk, the kind that emits acetic acid as it cures, so it smells like vinegar. Colors are opaque, so if you use them you can’t see whether you’ve achieved a leak-free joint. I also have a vague sense that they may not be quite as strong. Silicone doesn’t adhere to glass very well in the first place, and it has seemed to me that the versions that don’t emit acetic acid when they cure (for example, versions that claim to be paintable) adhere even less, so the joints tend to leak and fall apart.
Here is a view of the completed cuvette:
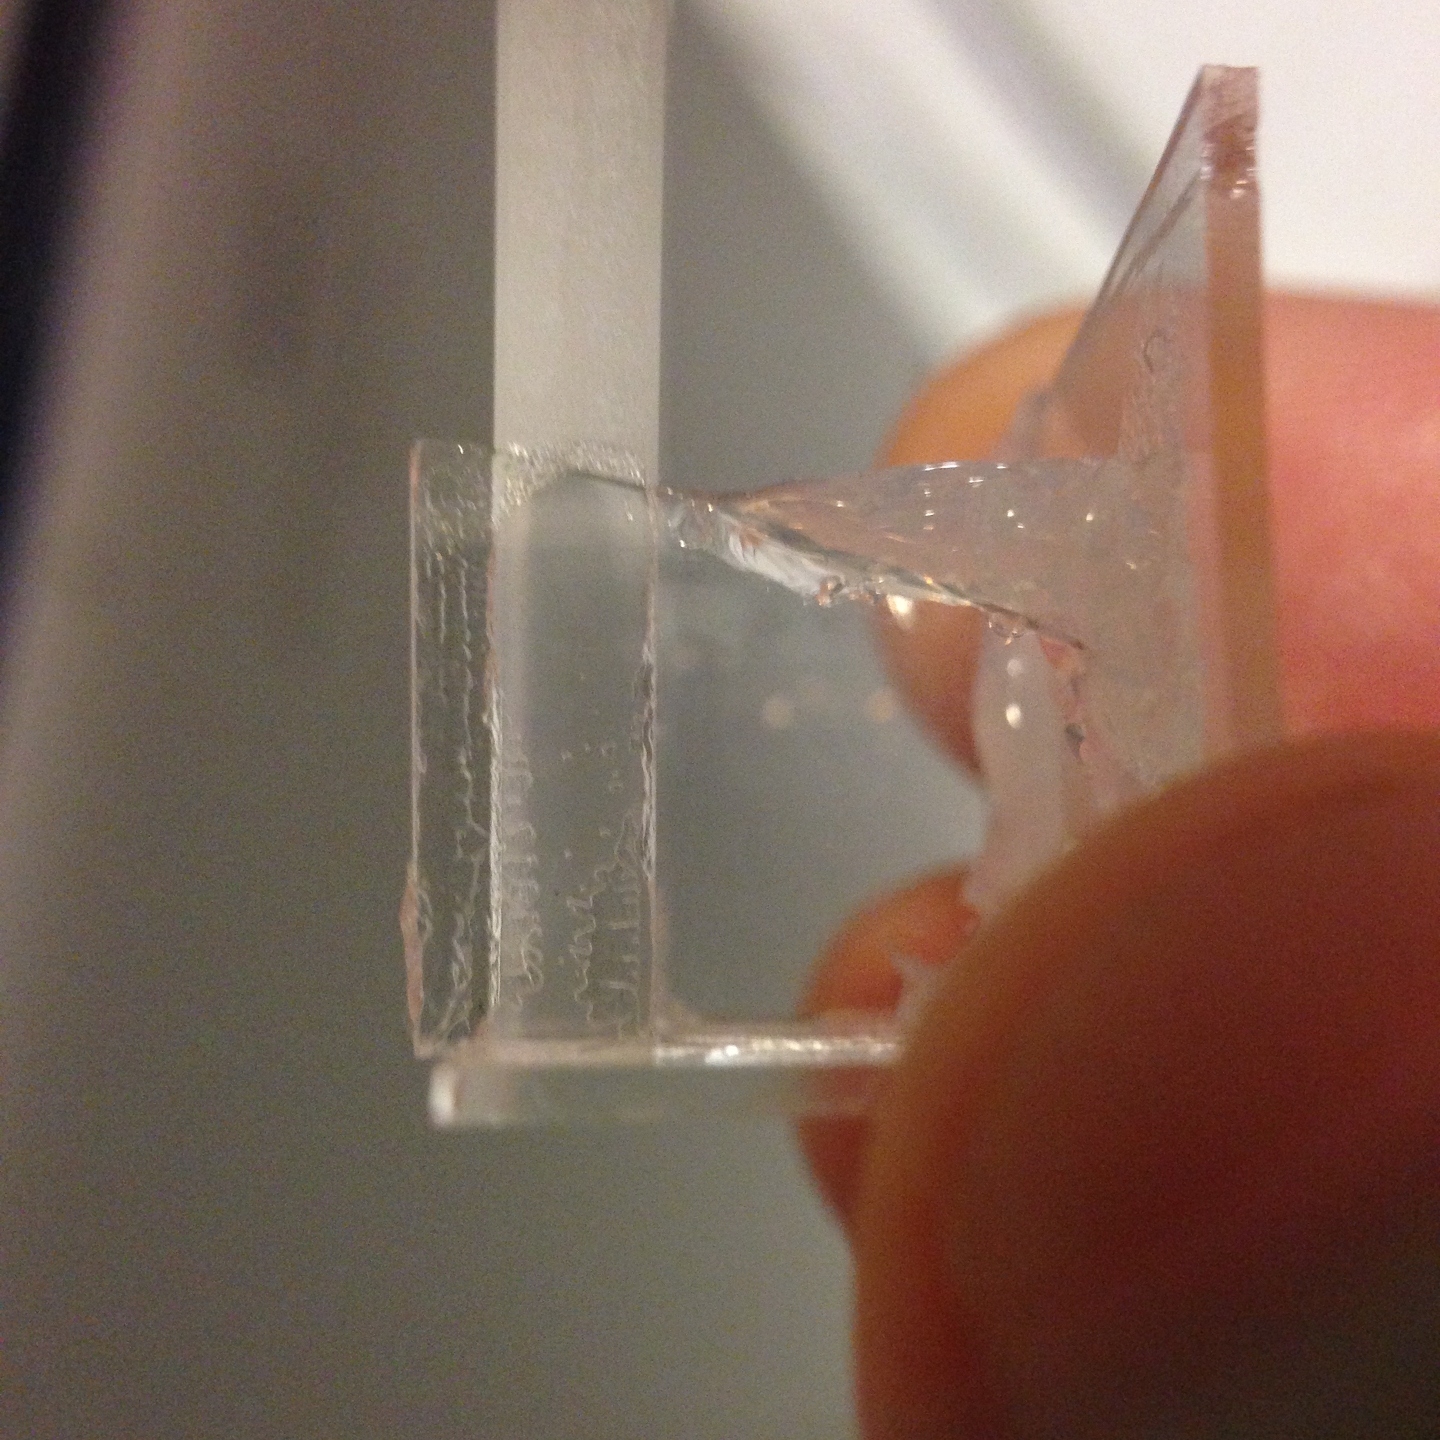
Because the active region of the dye solution is right behind the front window, it is crucially important to avoid obscuring that region. I did a mediocre job with this cuvette because I was in too much of a rush when I built it, and I got some caulk in just the wrong place. It is far better to take your time, and build on a reasonable bench with proper tooling.
Here are macro views of the cuvette (both taken from the same side), showing the attachments of the side windows. The second photo shows a small amount of caulk that remains on the far window after I scraped away as much of the excess as I could [cautiously!] with an X-Acto knife...
Here’s a view of the little fused silica cylindrical lens that I typically use to focus the output of a TEA nitrogen laser into the front of a cuvette when that is appropriate or necessary:
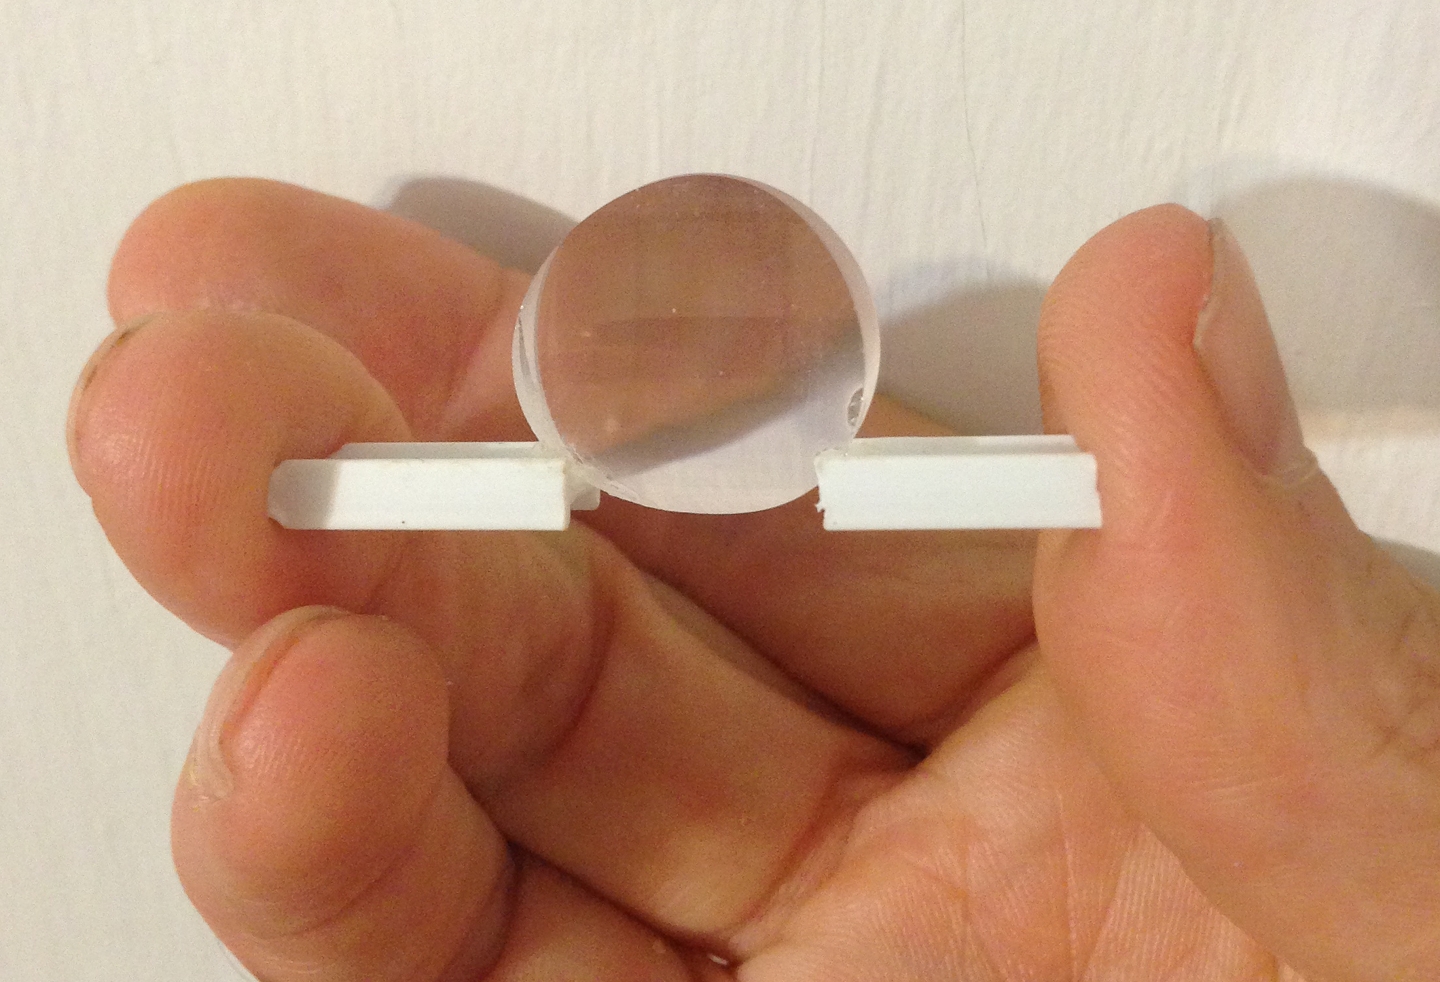
It is anti-reflection coated for 337 nm, and is obviously intended for this use. It won’t stand up on its own, so I’ve mounted it on two short pieces of ABS plastic I-beam from the hobby shop.
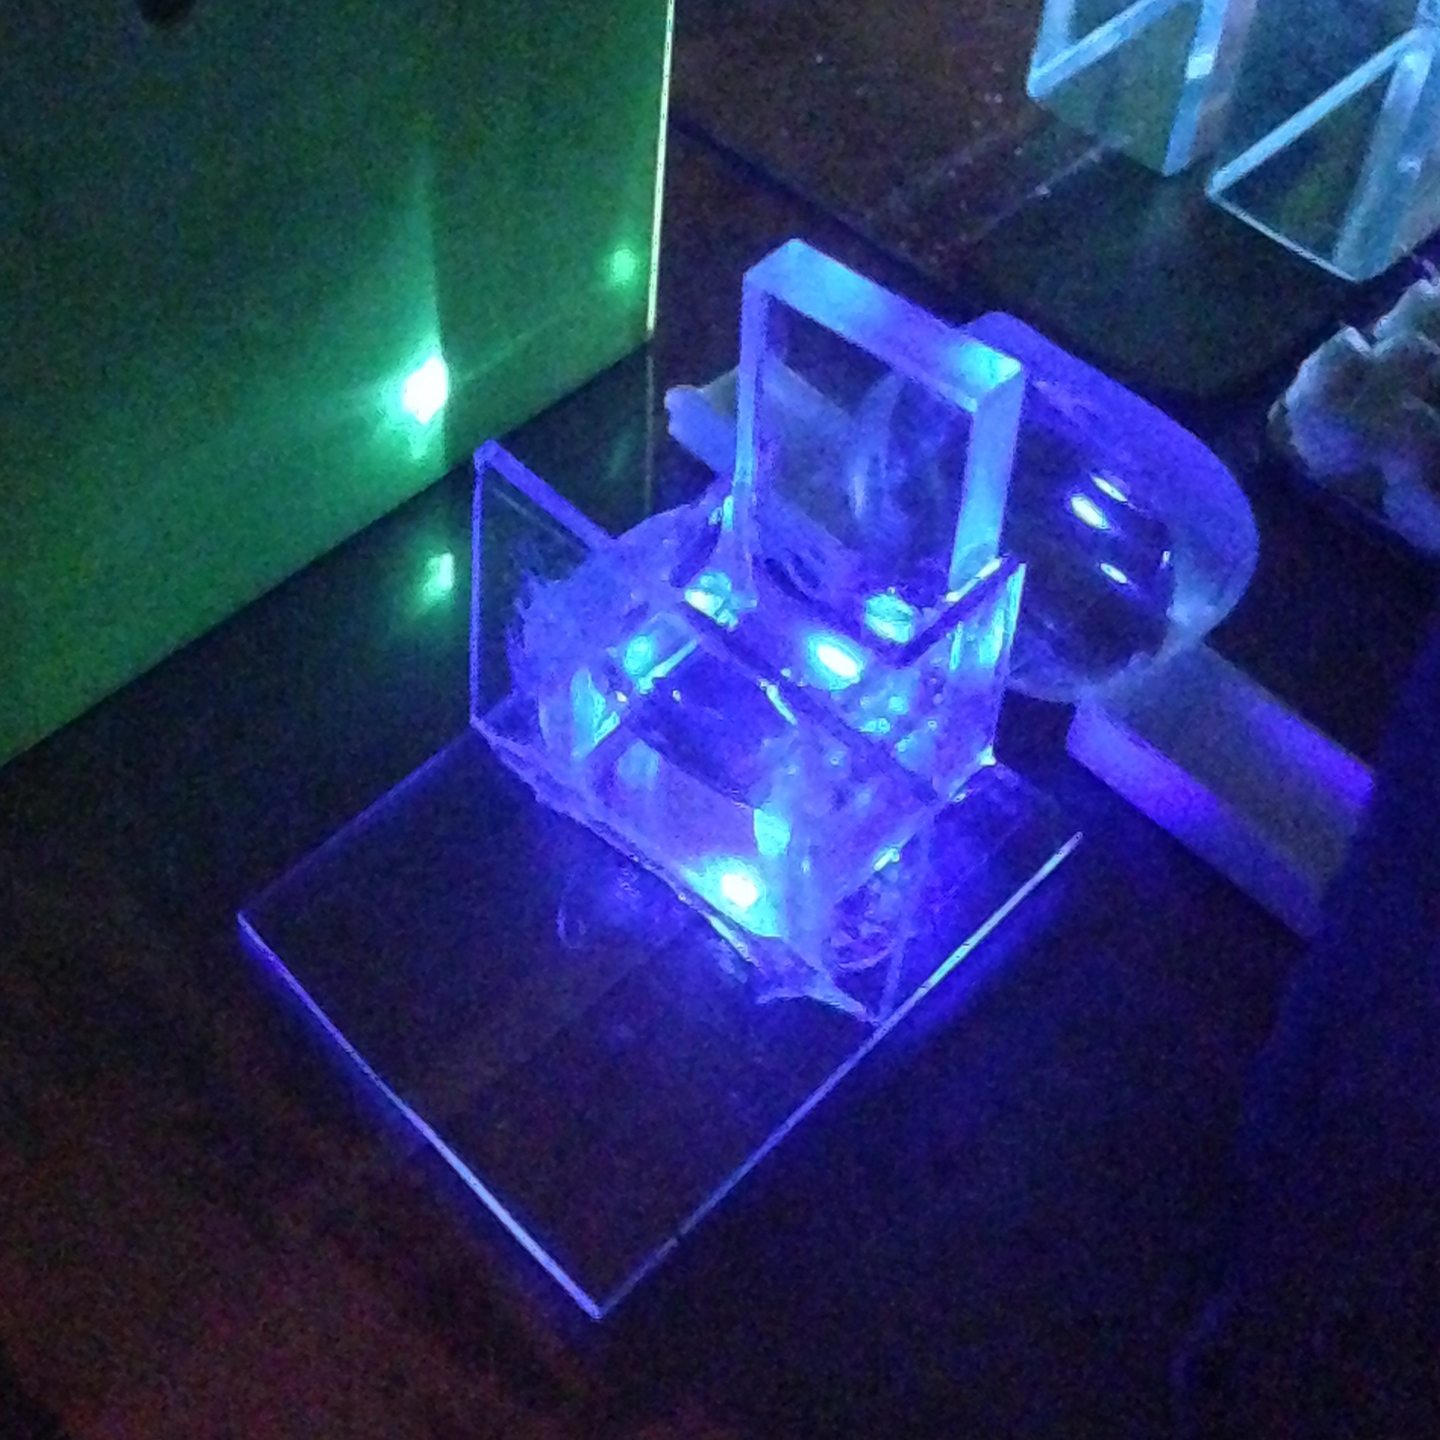
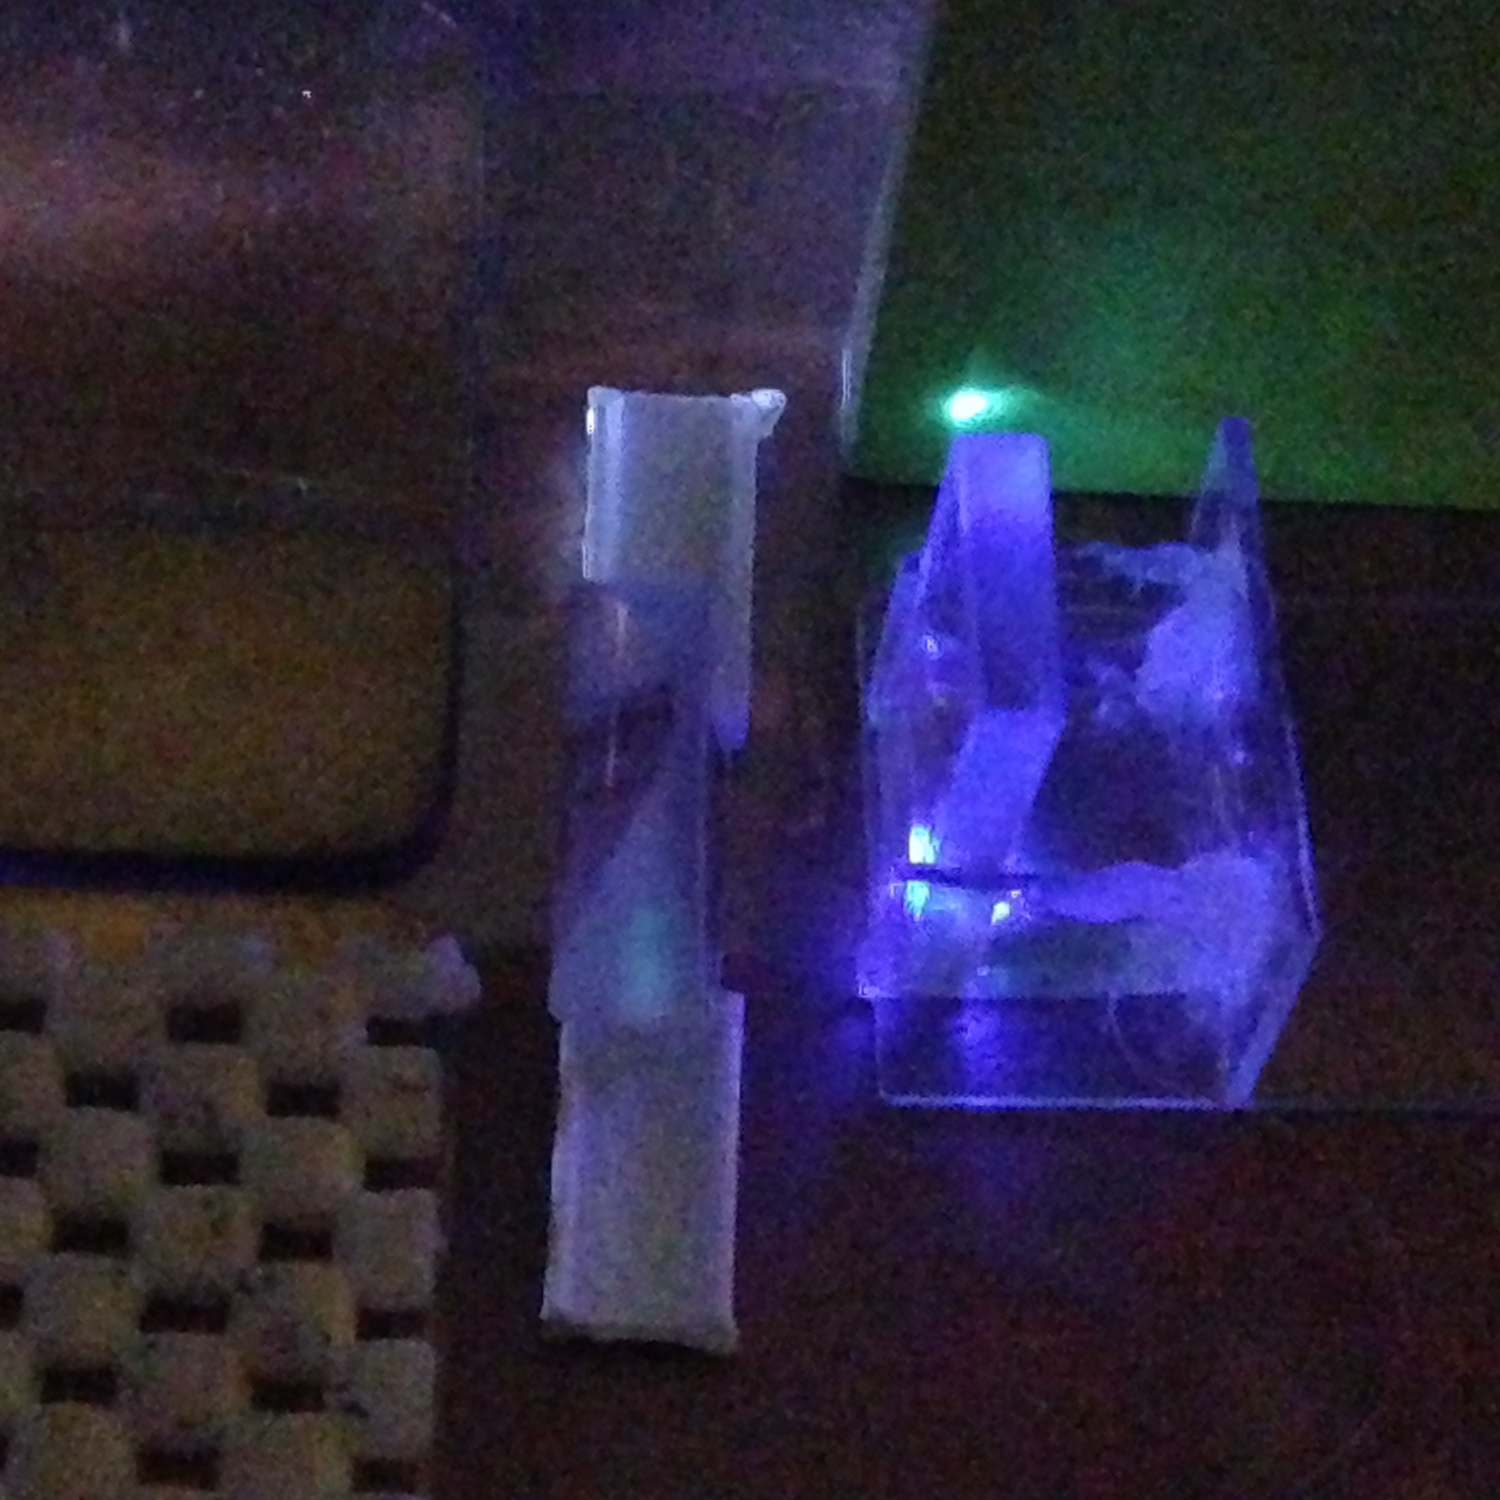
Here is what the cuvette looks like when it is in use. In the first two photos the output of the dye is displayed on a fluorescent viewing screen, which is why the beam appears green even though the dye is obviously emitting deep blue. Left end of the channel (oblique view, a duplicate of the image at the top of the page), then the right end, then an oblique view of the right end with a different dye mixture (see below for specifics), in this instance lasing onto a piece of paper:

Notice the extremely short focal length of the cylindrical lens. The front window of the cuvette has to be close to the front of the base so that the base doesn’t interfere with the lens or its mounting. (A real mount probably extends outward a bit farther than the bits of ABS I used.) This is, of course, not an issue with lenses that have longer focal length, as most do (see next photo).
Also, notice the fact that the curved side of the lens faces the channel, and the flat side faces the cuvette. This deflects the beam upward. If the flat side faces the channel and the lens is not tilted to compensate, the beam goes down into the ground plane, which is counterproductive. In this photo I am using a lens with longer focal length, which I have tilted appropriately:
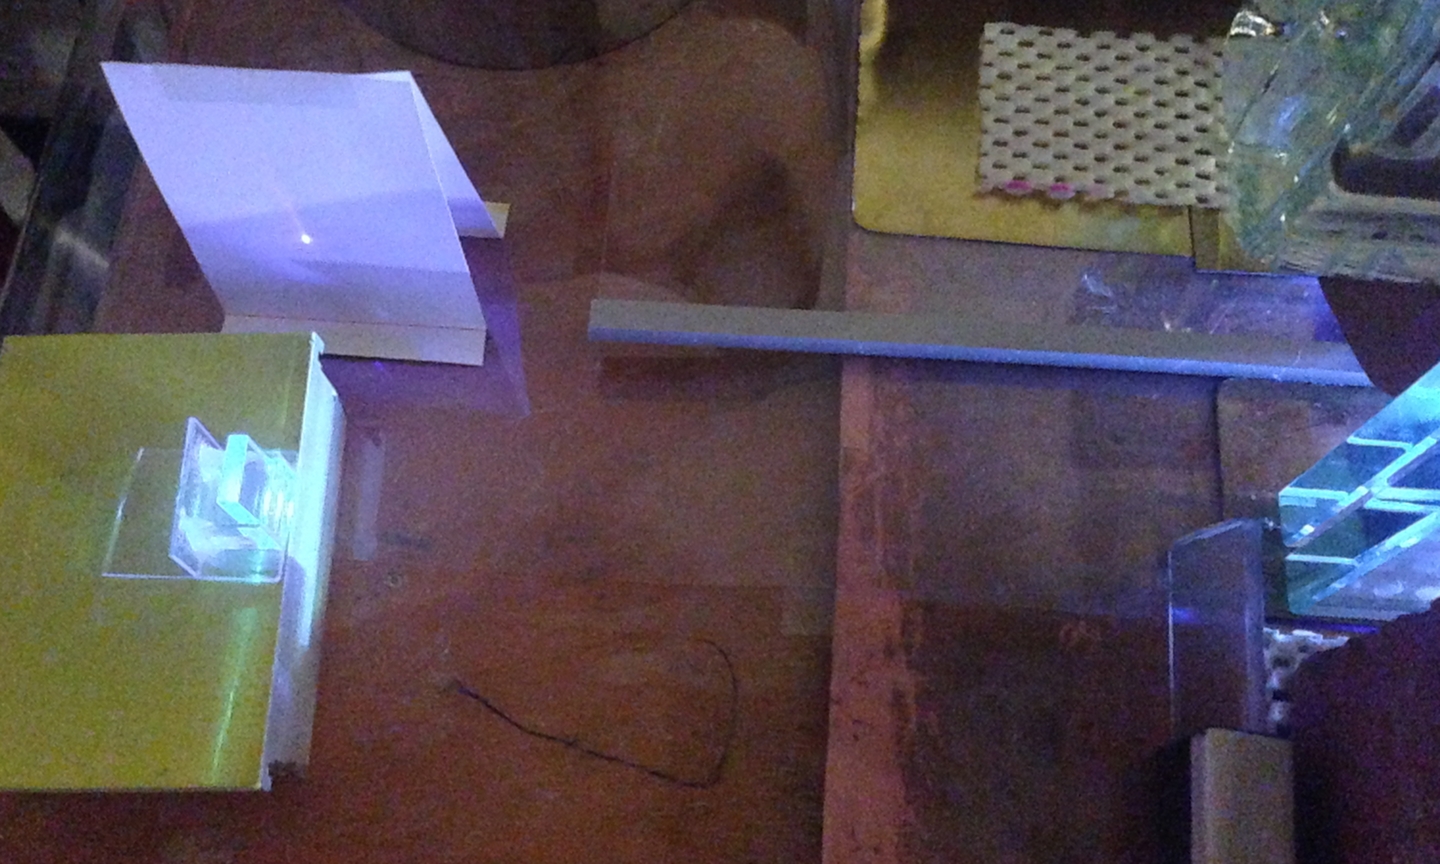
(The lens is at lower right; it is about 17 cm from the cuvette. This lens is not anti-reflection coated for 337 nm, so it presumably has higher reflection losses than the coated lens I used for most of the work I show on this page. That and the longer fl make it slightly more difficult for the beam from the nitrogen laser to bring the dye to threshold; if your nitrogen laser delivers very high peak power this shouldn’t be much of an issue, but on smaller lasers [like the one I’m using] it can be a problem.)
Note: the wobbly graininess that you see if you expand these photos to full size is caused by the fact that my phone automagically turned up its ISO speed to compensate for the low light level in the room; it doesn’t have time to turn down the ISO during a pulse. (This is actually helpful: if it did turn its speed down, the background would be too dark.)
The dye for the first two photos is something I usually refer to as “DTC”. (It’s actually “Optic Whitener”, from Dharma Trading Co., an excellent textile house on the Web. You can find it by searching on the word optic on their site.) This product is truly a gift to DIYers — if they haven’t raised the price, 8 ounces of it will cost you $4 plus shipping, and it takes about one drop for a cuvette of this size. (For a commercial 3cc cuvette I usually use 2 to 4 small drops.) The solvent is isopropyl rubbing alcohol from the drugstore. Some people seem to think that iso is not a good solvent for laser dyes, but I use it much of the time without any trouble. [There is one joyous Russian paper in which the authors reported dropping 10 kJ at a time into their flashlamps [!!], pumping Rhodamine 6G, and found that iso worked a lot better than ethanol.]
For the third photo I used a mixture of Fluorescein and 7-Diethylamino-4-Methyl-Coumarin, in ethanol. (See The first Sideline for more information about mixtures of this sort.) I will note that for some reason the solution seems to be slightly turbid, so there is a large amount of scatter, and the output is not as sharp or bright as I would have liked. (Subtlety: notice that the light from the front of the cuvette, which is reflected from the cylindrical lens, has a lot more blue in it than the light coming through the cuvette. There would probably be a bit more blue with just Fluorescein in the cuvette, but not nearly as much as you see here. The extra blue is from the Coumarin; the light that comes out the front of the cuvette hasn’t been through enough of the solution for the Fluorescein to have had a chance to absorb it.)
Note: Because the pulse from a TEA nitrogen laser is
only about 1 nsec long, it is not always easy to
construct a dye laser with external mirrors that is
intended for TEA N2 pumping; I rarely bother.
It is also relatively difficult to tune dye lasers that
are pumped by TEA nitrogen lasers, as the dye laser
light doesn’t have time to make very many passes
through the dye, and ASE [“Amplified Spontaneous
Emission”, a term I am distinctly uneasy about]
tends to interfere.
To the main Index for my current research work
For contact information, please see the index.
Last modified: Fri Oct 11 00:42:19 EDT 2013