(2003 November 3)
Having [after some travail] gotten good results with my previous forced-air burner, I decided to build a larger one. I’m using a very nice EG&G Rotron fan that came out of a disused microwave transmitter; it pulls almost 3 amps, so I think the motor (which is remarkably compact) is putting out 1/3 hp. It’s a cute design, too -- the inlet air helps cool the motor.
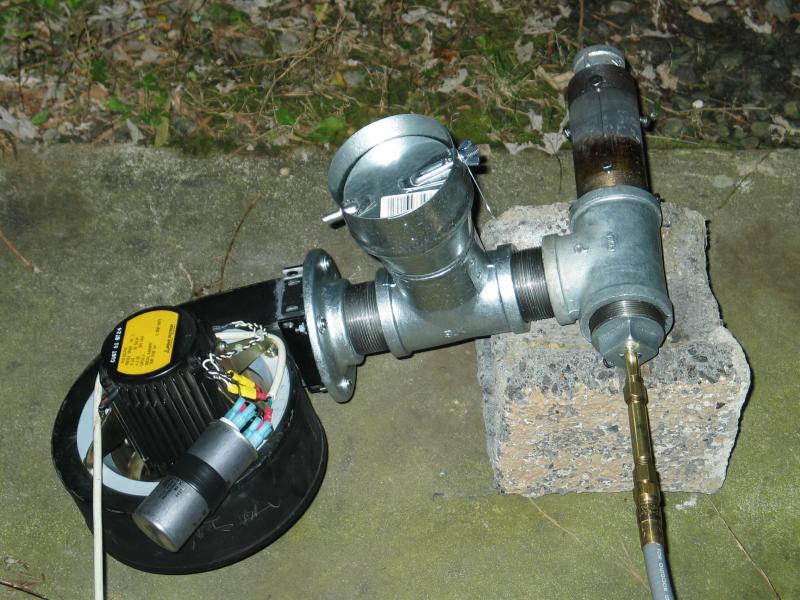
The design is quite similar to the earlier one, but I used 2" pipe for the outer jacket on this one, and 2" fittings. When I first tested it, the flame kept blowing off. The blower design, as you can see from the photos, doesn’t really let me block off its air inlet, so instead I added a second pipe tee and a damper to bleed off some of the air coming out of the blower, in a more or less controlled manner. I lucked out with the parts for the spill -- the 4"-to-3" galvanized sheet-metal adapter from the hardware store just fits over the pipe tee, and is held on by a hose clamp. I probably would have preferred a slightly more formal setup, but that would have cost noticeably more than the six or eight bucks that I spent on this one, and I’m not sure it would have worked all that much better. (I am sure it would have been easier to adjust, though.)
Once I got the damper in place I found that the burner would hold a flame, but I still had to turn up the pressure most of the way, so I swapped out the gas orifice (a Tweco #14T wire-feeder tip) for one that I’d drilled out to 1/16". It’s probably significantly less efficient than a new one of the correct size, but it will do for now. (I’ve played with things a bit since I wrote that, and have managed to adjust the positions of the inner pipe and the orifice so that the burner will operate over a wider range of pressure settings.)
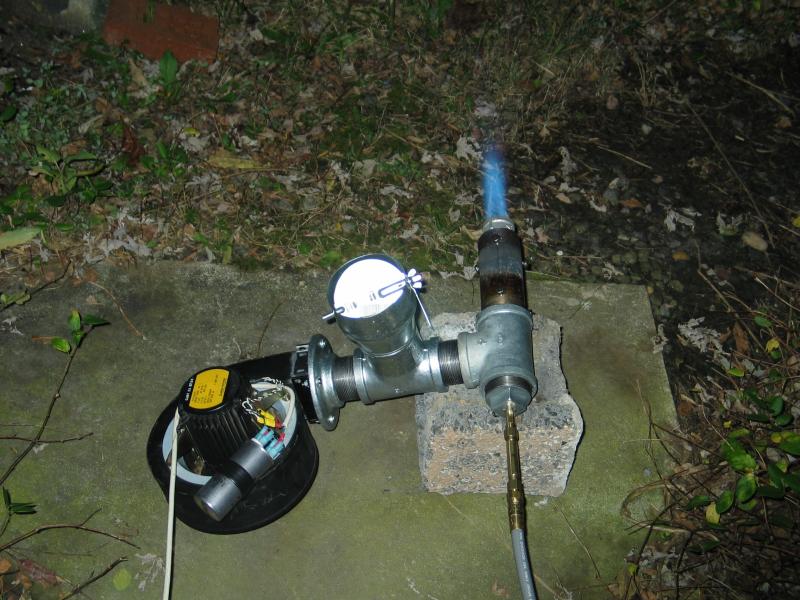
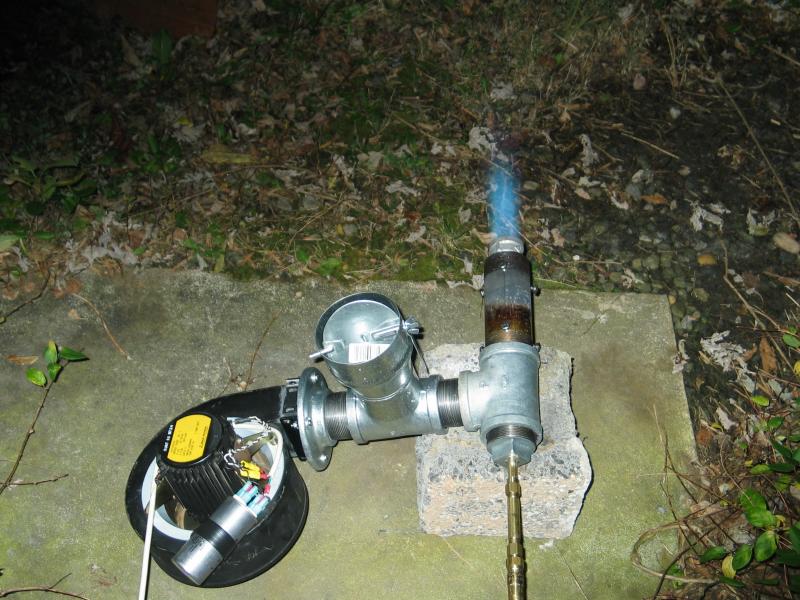
Here are a few photos. First the burner itself, from fairly close in, then two shots of the burner in operation. (As usual, if you click one of the small images you get a larger one, 800x600 px.)
It may be difficult to see in these images, but the
flame is noticeably more green when the damper is open;
it’s also slightly more opaque, and slightly longer.
Here’s one that I took without the flash. As you can see from the damper position the flame is probably oxidizing, though if I turn the gas all the way up it does tend to show a bit of greenishness. The flame is bright enough here that the color is not really apparent, but I think it was blue.
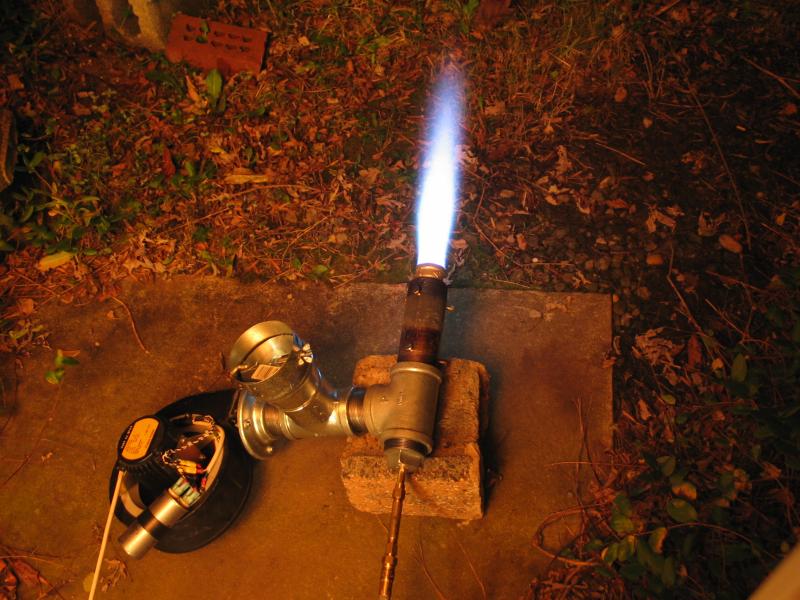
The one thing these pictures really can’t even begin to convey is the sound -- the earlier burner makes a nice rushing sound, with its little blowers and fairly calm gas flow. This one really roars, and I keep getting a slightly antsy feeling that I’m too close to something I shouldn’t be near...
I’m generally pleased with the performance I’m seeing,
but I think I’m going to have to build a new kiln to use
it. (Time to talk to the local scrap-metal people about
110-gallon steel drums.)
(February 20, 2005)
A month or three back I decided to test this burner on my small gas kiln, a converted Paragon electric. I knew it was going to be overkill, but I didn’t have a full sense of the magnitude until I tried it...
I put a bowl and a test tile into the kiln, preheated to about 150° C with a propane torch as usual, to avoid problems with the water from the glazes, and then turned on the burner, with the air spill wide open and about 3 psi of propane. It immediately blew out some of the bits of fiber blanket that I had placed between the top of the kiln and the lid to stop up minor leaks, and I realized that I didn’t really want to look into the spyhole to check the cones. Fortunately, I have a type S platinum thermocouple on the kiln, and I was able to watch the temperature on the trusty Omega readout.
I valiantly attempted to put the kiln into reduction, by repeatedly turning up the gas pressure. This failed miserably, which tells me that I may have to change to a slightly less valiant fan. OTOH, the rate of increase of temperature never really slowed down, and I terminated the firing, at 1322° C, after 19 minutes and 52 seconds! Bisqueware being what it is (lots of people have used pit-fired porous ware for cooking over coals or even direct flame), both test tile and bowl survived the experience. Don’t let anyone tell you that you can’t fire fast — unless they are talking about greenware, it just ain’t so. (Greenware exposed to this sort of treatment, OTOH, would simply explode. I can’t fire any greenware piece that is larger than a small conepack under ordinary conditions, though I must admit that my idea of an “ordinary” firing is one that takes 90 or 100 minutes to get from 150° C to cone 10.)
I hope to convert an old Dyna-Kiln to gas, and use this
burner, possibly with a smaller fan, to power it.
(People keep giving me Dynas, and I now have 3 or 4 of
them; I figure it’s their loss and my gain —
the Dyna is a wonderful kiln.) I’m currently
trying to decide where the flame inlet and exhaust
outlet should be. I don’t think I want to make it
into an updraft kiln, but at the same time I do want to
have good circulation inside, so that all the ware gets
cooked. Working on it...
The entire burner is made of things you can get at a hardware store except for the blower, which I’ve explained above, and the orifice, which is a wire-feeder tip intended for MIG welding; it costs a dollar and a half at the local welding-supply place. As with the previous burner, an extremely similar design, I’m indebted to Ron Reil and the other folks who have put forge-burner designs on the Web.
If you build one of these, please remember that the
flame emits copious quantities of UV, which isn’t
good for your corneas (or skin), and a hot kiln emits
copious quantities of IR, which can give you cataracts.
Wear welding goggles or equivalent protective devices
when you look in there! Also, be extremely careful about
gas leaks. It is a good idea to have an automatic shutoff,
in case the flame goes out when you aren’t looking.
If you don’t have an automatic, stay with the kiln
whenever the burner is lit.
Email: a@b.com, where “A” is my first name (just jon, only 3 letters, no “h”), and “B” is joss.
Phone: +1 240 604 4495.
Last modified: Sun Feb 17 00:35:45 EST 2013