(28 February, 2008)
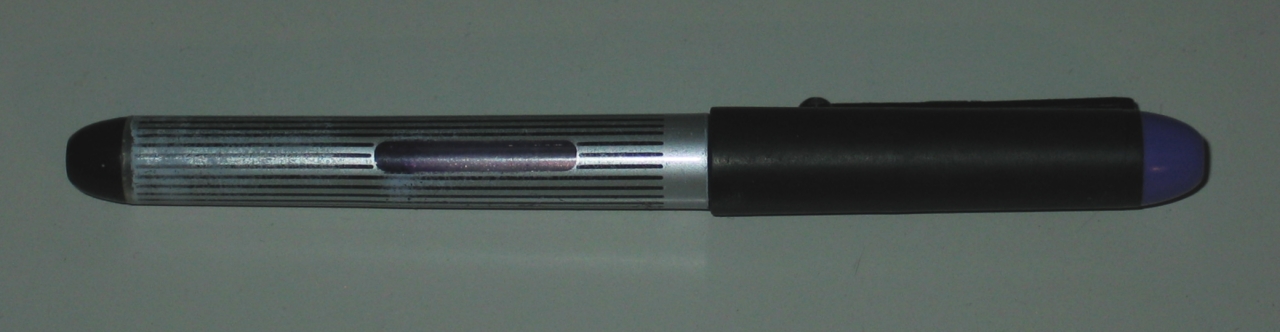
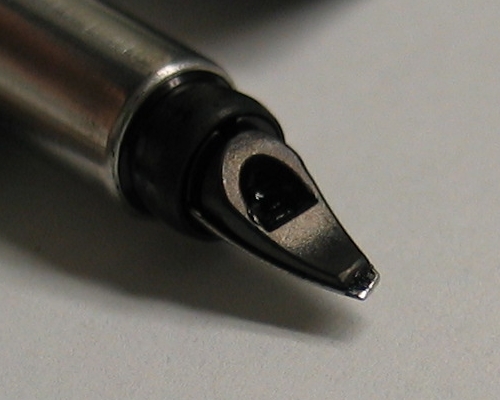
Last year, I was given two Pilot “Varsity” fountain pens by the redoubtable Kludge. Here’s one of them:
These pens have stainless steel nibs, which should, in principle, last for a number of years; but after you use them for a while you discover that there is no obvious way to refill them — when they run out of ink, you are supposed to throw them away. While I admit that there are good arguments in favor of a few (very few!) disposable items, for the most part I hate disposables, and I find this extremely offensive.
I took a quick look at the structure of the pen, but I did not find any obvious point of entry. (Gareth Branwyn, who was kind enough to note this page on the Make Magazine blog, however, tells me that it is possible to remove the point.) Then, while cruising on Simon Quellen Field’s excellent Science Toys Website, I came across something that seemed like a great idea: Simon uses a common canning jar as the chamber of a simple vacuum system. As soon as I saw the words “canning jar” and the photo on his page (it’s in Chapter 6, Aerodynamics), I knew I had the solution to my problem. The hardware store provided two quick-connects intended for polypropylene tubing. I chopped two holes in a canning jar lid, screwed the quick-connects through the holes, and used silicone rubber caulk to seal them in. Here is one of the jars I’ve used with this lid:
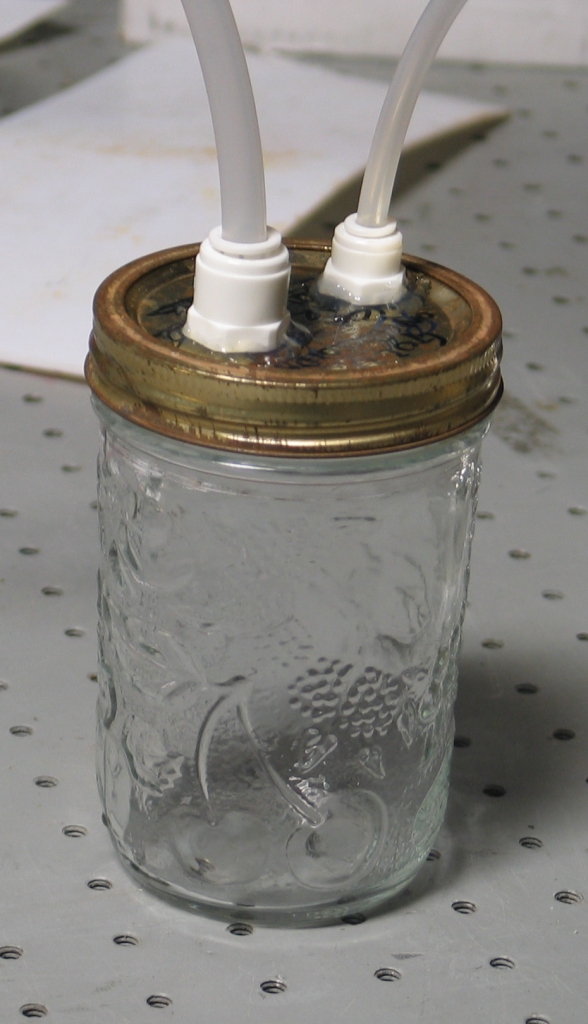
Note: Under ordinary circumstances, even though I am not pulling much vacuum on the jar, I keep it inside a strong container. It is, after all, glass, and if it implodes I don’t particularly want to be hit by flying shards. For the purposes of this page, however, I needed it to be out in the open so I could take photos.
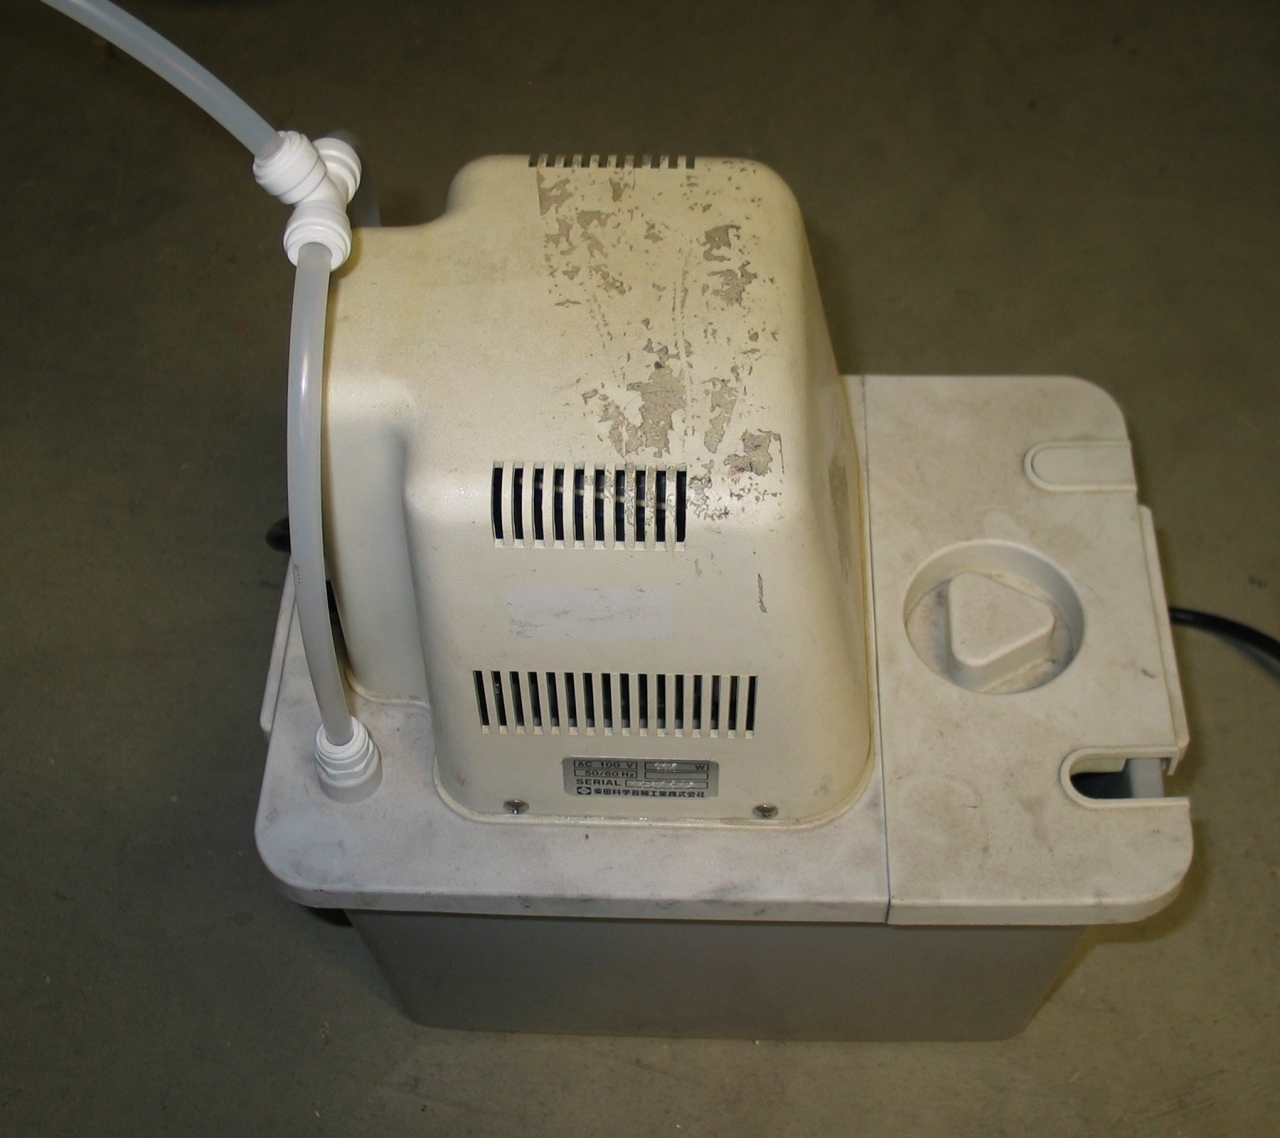
The hose from one quick-connect goes to an old refrigerator compressor that I occasionally use as a vacuum pump, or to a very nice Brinkmann dual-aspirator pump that I got on eBay. The other hose goes to my thumb, which I use as a valve. Here’s the aspirator pump:
The procedure has two parts, both of which are extremely straightforward and quick. The first puts ink into the pen:
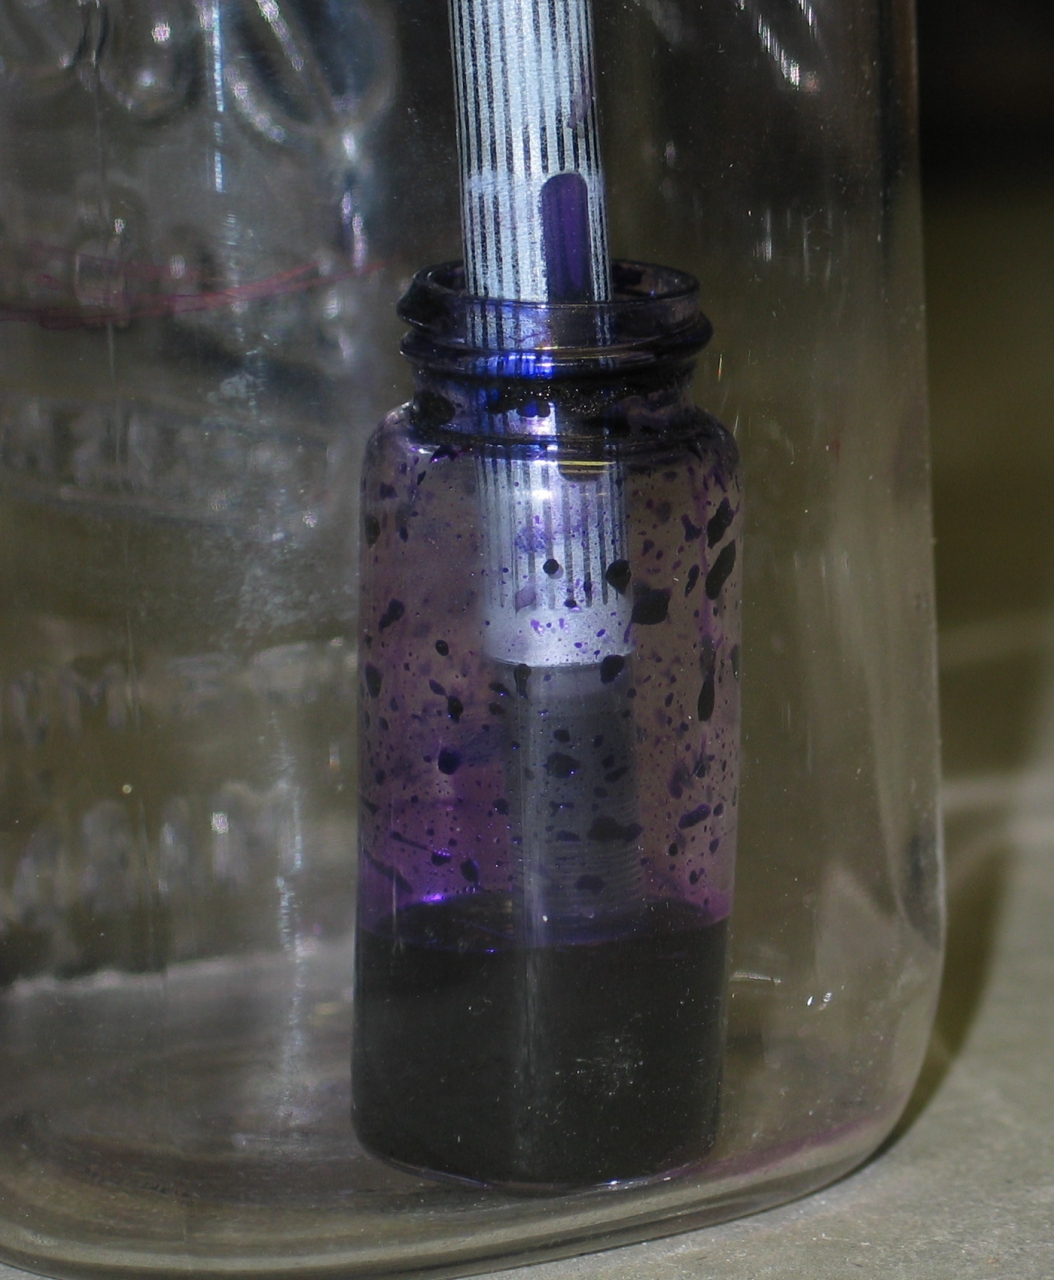
The second procedure clears the air channels, and helps prevent the pen from leaking:
Here’s a series of photos showing the channels progressively clearing as I take a pen through this cycle a few times:
Here is a view of the filled pen, showing the rings and the long channel a bit more clearly:
With proper care, you should get several years’
use out of a pen of this sort. The technique probably
also works with some other types of disposable pen, but
you do have to be sure that you have compatible ink;
some pens use inks that are based on special solvents,
or have special ingredients, and those inks may not be
happy mixing with ordinary fountain pen inks. Even some
“regular” fountain pen inks do not play well
with others. (I’ve been using Waterman violet ink
in my Varsity pens, and they seem to tolerate it just
fine.)
I started doing calligraphy in 1969, and soon found that I had two obvious problems, both having to do with the fact that I’m left handed. First, because left-handers have such a huge variety of hand positions (or at least so I was told) I couldn’t find anyone to teach me, so I had to teach myself. I took care of this by having friends write out alphabets for me, which I copied. I also acquired some books with calligraphy examples, and I kept my eyes open for good examples.
Second, because I do not write with my hand in either of the common variant positions, I can’t use either a right-handed nib or a “crank point” left-handed nib. I have to have a nib that is essentially a mirror image of the usual right-handed style. (You can see the slant I use in the pen photos, below.)
I tried cutting slanted points on felt-tip markers. That worked, but they wore out rather rapidly, which was annoying. Also, they are disposable, which is even more annoying. (I hate disposable things, as I mentioned above.) Then I discovered that some technical drafting pens have interchangeable nibs, and I was able to get the slant I wanted; but those pens were made for drafting-table use, not for carrying around in a shirt pocket. It became clear that I would have to figure out a way to shape the nibs of ordinary fountain pens or calligraphy fountain pens to suit my hand. I eventually developed a technique that allows me to do this. I wouldn’t want to ruin a fancy nib with a noble-metal point, though, so I haven’t tried it with one of those. Most of my current pens are Parker “Vector” fountain pens, for which I buy converter tanks so I can avoid disposable cartridges.
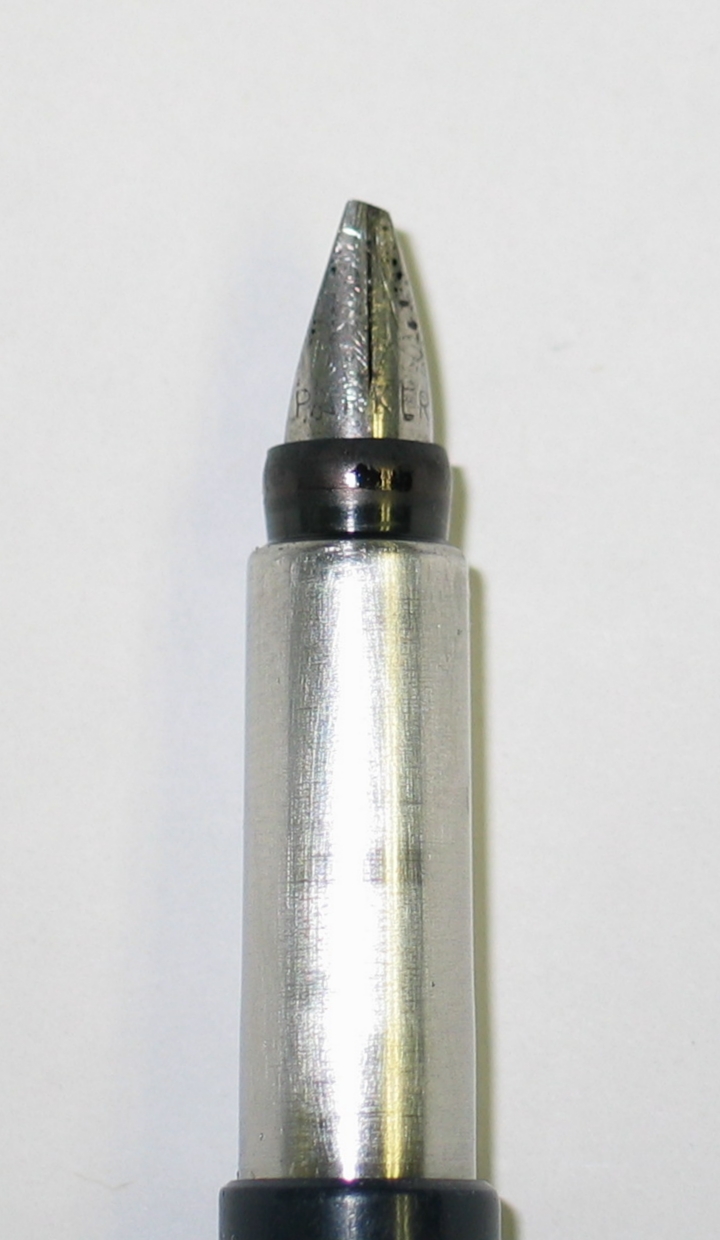
If I want a very broad nib, I start by clipping the point off at an appropriate place and angle, using a pair of diagonal cutters. If I don’t need to get that extreme, I often use a diamond grinding wheel on a hand-held rotary tool to rough in the shape. (I use a Dremel, which I like pretty well.) This simplifies the early part of the process by making the rough shaping very rapid, but you have to be very careful, because it is easy to go too fast.
Once I have the slant I want, at about the right width, it is time to establish correct angles and corners and surfaces. I am looking for a large change in linewidth as the writing angle changes:
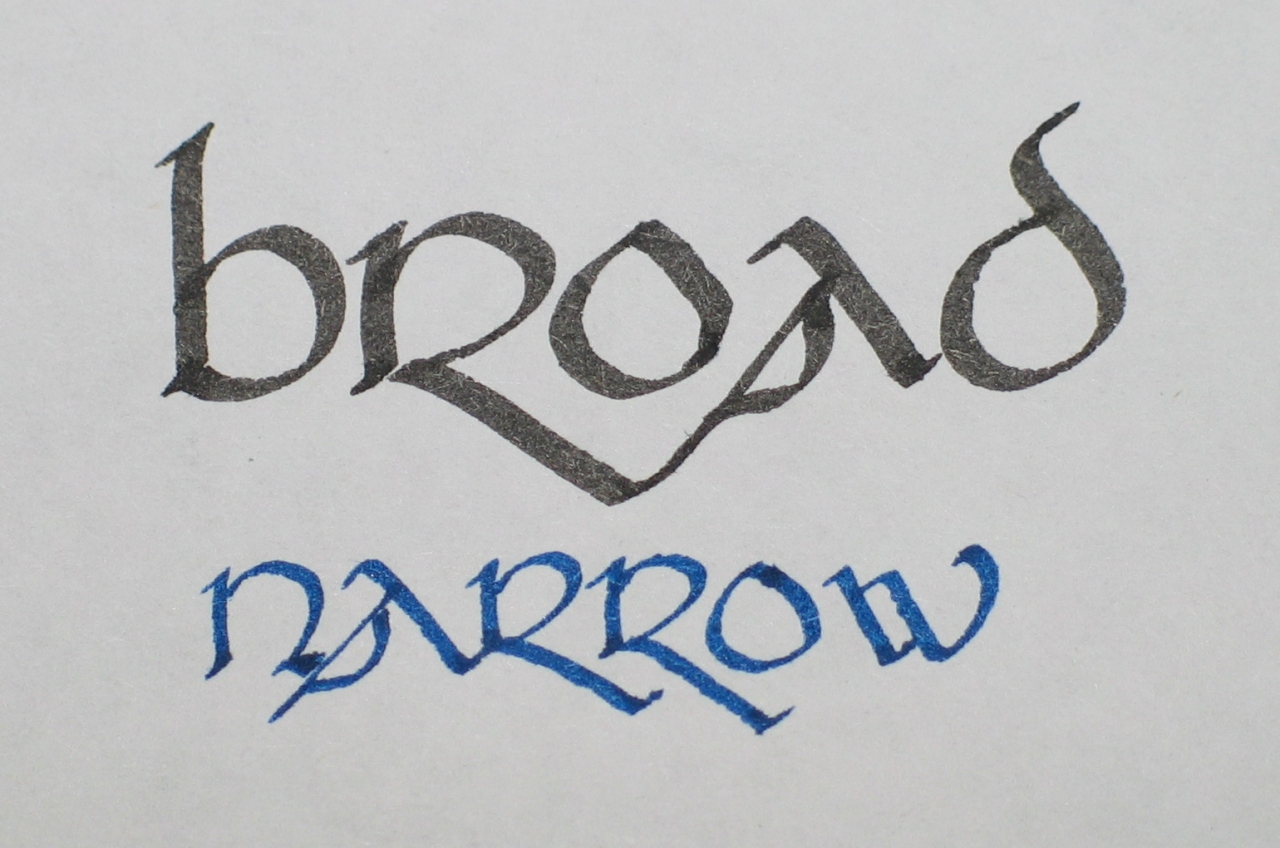
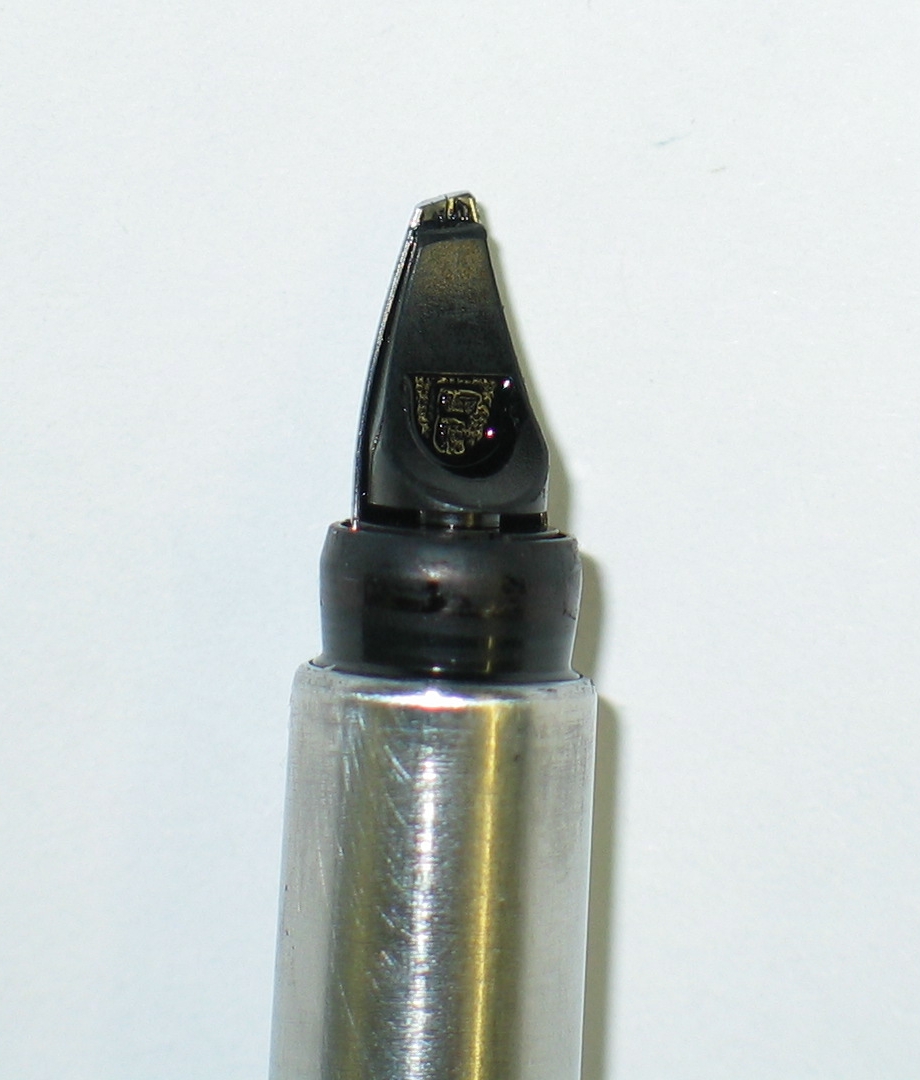
Here are over-and-under views of the pen I used to write the word “broad” above. Notice that because I was removing so much metal in order to get the width I wanted, I also had to shorten the plastic under the nib.
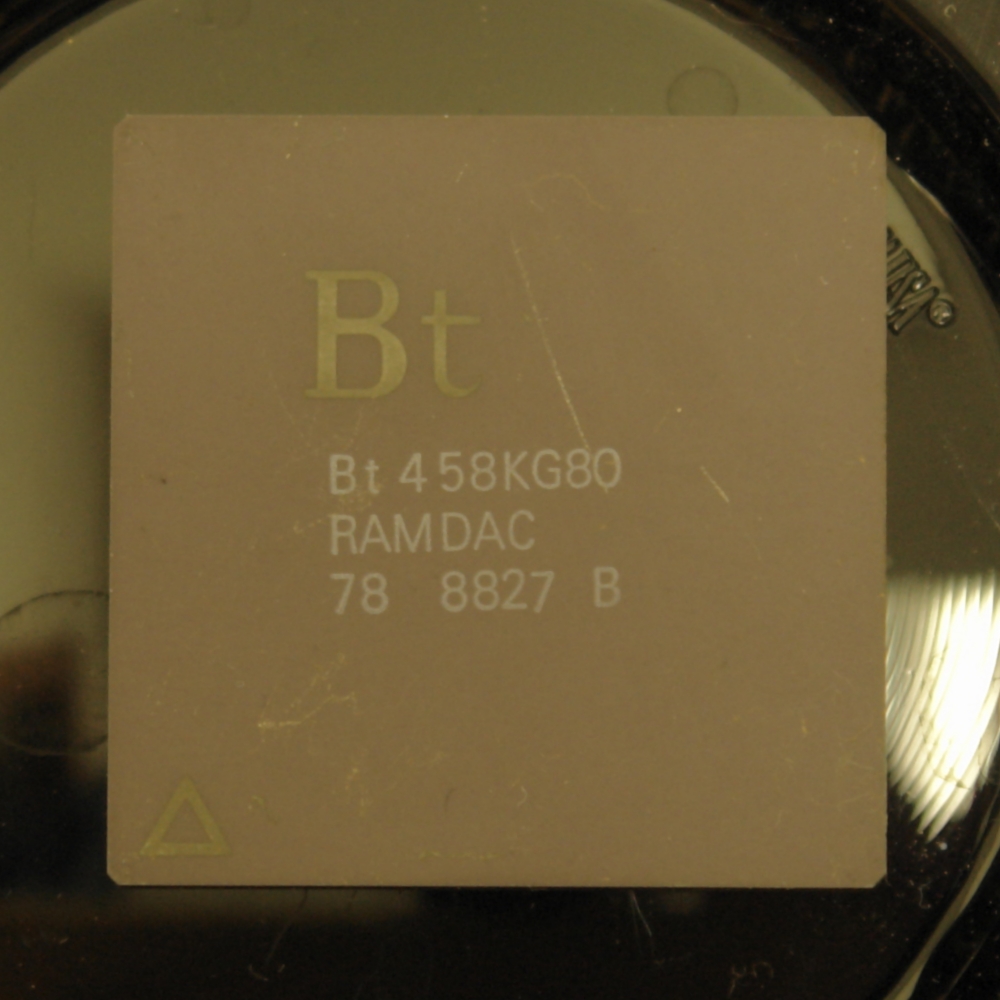
For general shaping I use gray, purple, or white ceramic integrated circuit packages as grindstones. They are made of a high-alumina ceramic composition that is probably about 1,000 times as hard as mild steel, and they have just the right grain size for the purpose. Even today some processor chips are available in ceramic packages, and a nice slow obsolete processor should be very easy to find. For polishing, I use the dark brown or dark gray packages that some older EPROMs, EEPROMs, and microprocessors used to come in. They are remarkably fine-grained. Here are a small grinder (left) and polisher (right) that I keep in my wallet in case of need:
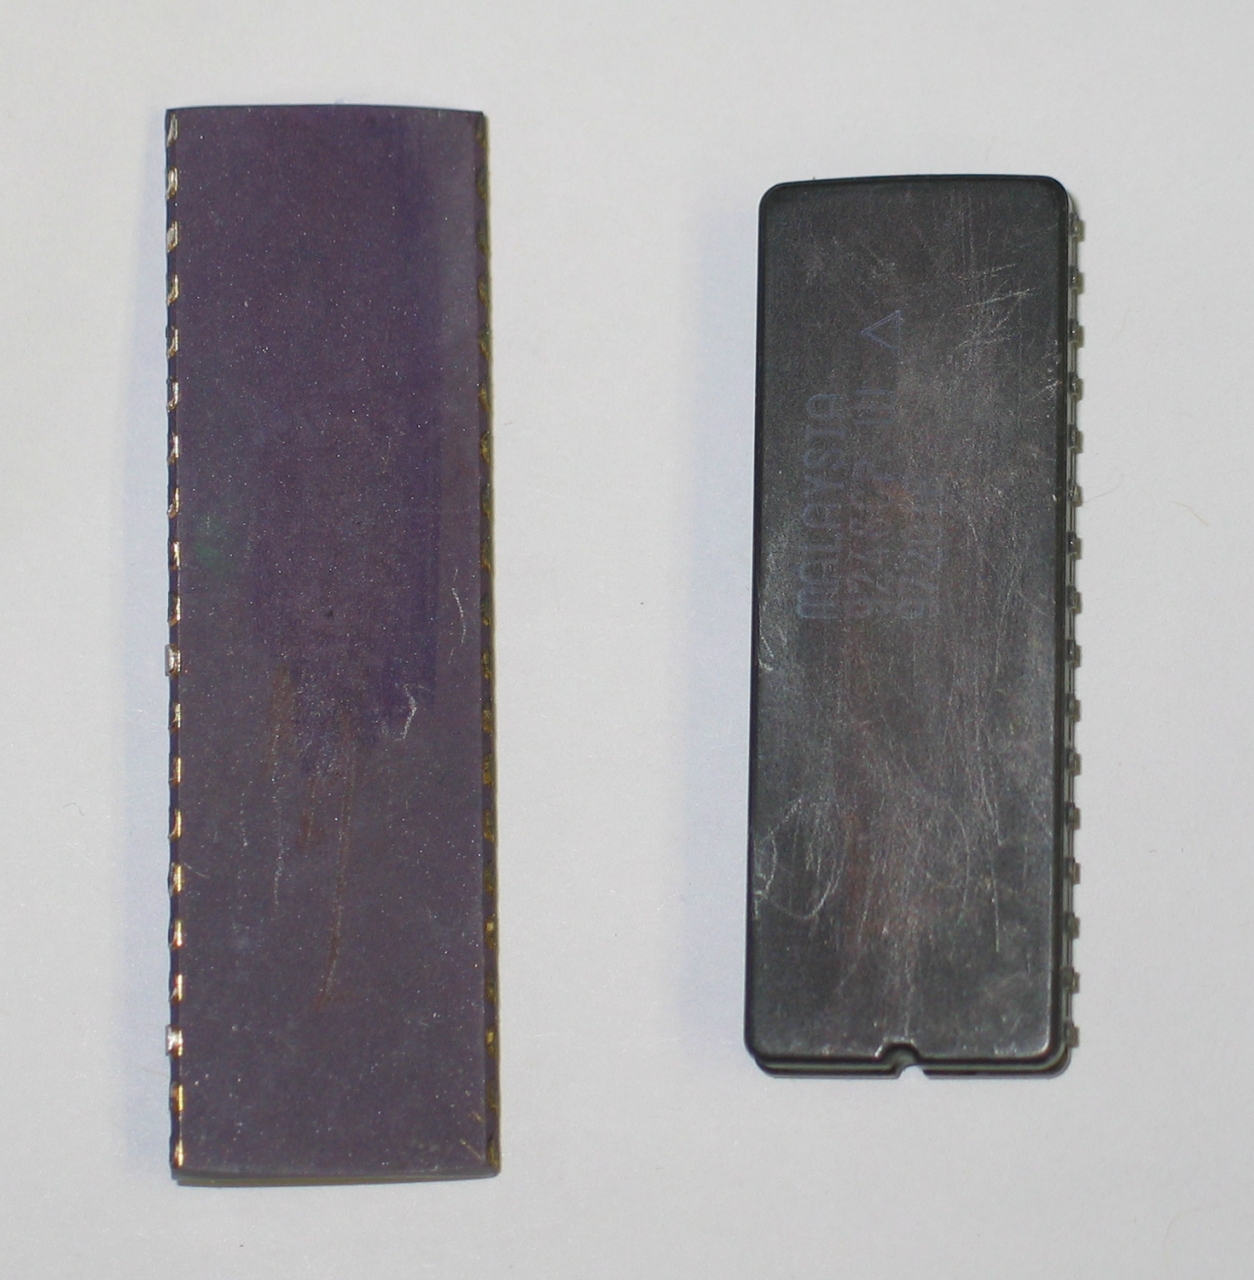
Some of the purple or light-brown ceramic, btw, displays a lovely deep-red fluorescence under blacklight [long-wave UV]:
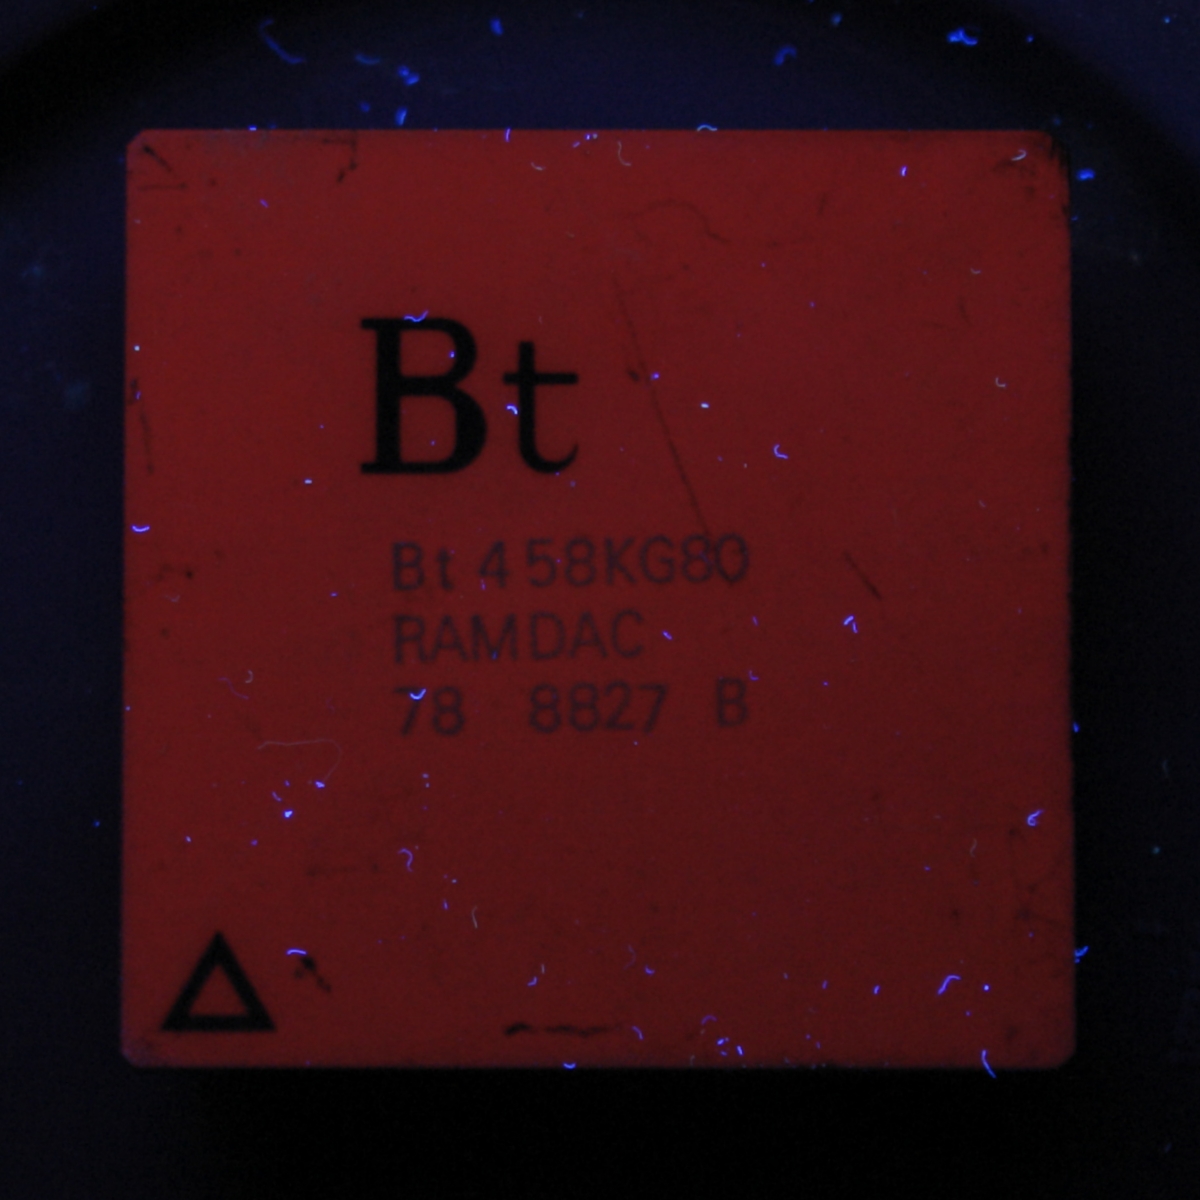
(I have an entire page of fluorescent things, including a bunch of glazes I worked up for my pottery.)
If there are any sharp corners or edges, the nib will dig in and tear the paper; hence the need for polishing. Here’s a slightly better look at the shape and character of the working surface of the nib. (When I have time, I will try to provide a drawing or even a photomicrograph, to make the details more evident; in the meanwhile, though, this will have to do.)
Notice that the leading edge is a single shape, nearly all the way across. If you find that you are getting something that looks more like two wedges, you’ll need to change the angle at which you are holding the pen to the grindstone.
All of the angles and corners must be right before the
pen will write well, and it took me a surprising amount
of practice before I got reasonably good at this. Be
patient with yourself. There may also be times when the
ink refuses to flow; when that happens, I usually find
that paper fibers and/or metal bits have clogged the
channel. Having a stereomicroscope or even a really good
loupe or magnifier helps quite a bit, because you can
see the changes you’re making and then feel the
difference in the way the pen meets the paper. When you
get a nib that writes really well, examine it
carefully. You may even want to photograph it, for
reference.
My email address is a@b.com, where a is my first name (just jon, only 3 letters, no “h”), and b is joss.
My phone number is +1 240 604 4495.
Last modified: Thu Jun 23 16:03:19 CDT 2016