(2008 Feb 02 et seq.)
In the middle of 2003, I converted a little Paragon electric kiln to gas firing with a forced-air burner. The kiln stood me in good stead for about four and a half years, but the chimney decayed to the point where I was obliged to improvise a temporary one, and it was clearly time to do a more thorough job of revamping things. This page covers that effort and its results.
First things first, however. Safety note:
If you build or use a fuel-fired kiln, please remember that
the flame emits copious quantities of UV, which isn’t
good for your corneas (or skin), and any hot kiln
emits copious quantities of IR, which can give you cataracts.
Wear welding goggles or equivalent protective gear when
you look in there! Also, be extremely careful about gas
leaks. Because I don’t have automatic shutoff
equipment on this burner, I stay with the kiln
throughout the firing. (Yeah, sometimes I leave long
enough to take a leak, but that’s about the
limit.)
To get started, I cut some pieces of fiberboard for a new chimney, sprayed them with ITC-100HT, and fired them to about cone 11 or 12 in the kiln. This helped to get rid of some of the inevitable shrinkage, and the new chimney seems to be somewhat more stable than my previous ones were.
Next, I tore out the rattier parts of the fiber blanket liner and replaced them with newer blanket. Because I’d been having trouble with leaks around the edge of the lid, I ran the new blanket up and over the edge. This was also a good move — I have had much less leakage since then, and it has been confined to small regions where it is easy to deal with.
Once I had things more or less in place, I sprayed ITC-100HT on the interior. I have heard pro and con about ITC, but on the whole it seems to me that the favorable reports have generally come from people who paid attention to Feriz Delkic’s suggestions about how to apply the material and what it is good for. (Feriz has had people ask him what the R value of ITC-100 is; these people clearly did not understand what is going on here. ITC-100 is not an insulator; it is a high-emissivity coating. This means that when it gets hot it radiates the heat back out very efficiently, and thus effectively serves as a reflector. The bottom line is: “Don’t Glop It On.” A thin, even coating is your best bet.)
It also occurred to me that I could move the inlet port
and the flue a bit further apart by enlarging them,
working mostly on the outer edges, which would give me
the space to add some sort of high-temperature liners.
I used fiber blanket scraps that I soaked in a slurry of
a low-expansion pseudo-porcelain formulation, and I will
discuss the results below.
The first firing included only a new hearthplate, freshly coated with ITC-100HT, and new stands for it. (For those who haven’t read the first page, the flame enters the kiln underneath the hearthplate.) This went reasonably well, but of course there was very little thermal mass. I then proceeded to use the kiln, and found that it seemed to be firing considerably faster than it had before the rebuild. In fact, two of the early firings took less than 60 minutes to reach cone 10, at 1310° Celsius.
I mention this partly to point up the fact that a fuel-fired kiln just isn’t the same as an electric kiln, where you have nice even resistive heating and very slow air motion. There are a great many parameters involved here; it takes considerable experience to suss them out, and in fact it is very easy to suss them out incorrectly, as I have discovered by doing so.
One of the things I noticed fairly early on was that if I positioned a cup in front of the flue, it would warp badly:
I leaned a broken piece of kiln shelf in front of the flue to change the path of the flame, and that helped decrease the amount of warping; but it also obscured my view of the opening, which turned out to be significant.
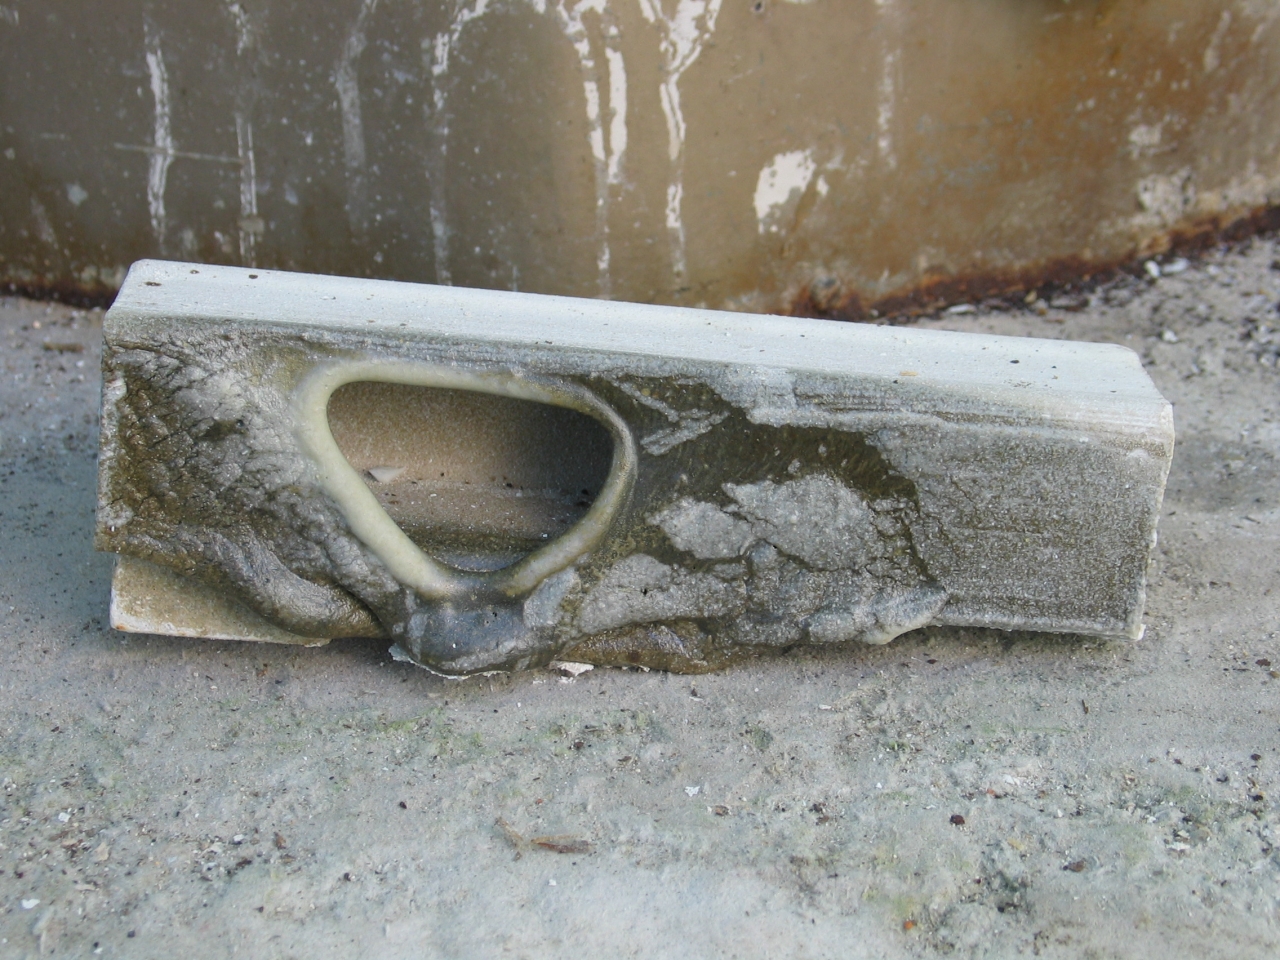
I should probably also note that firing as rapidly as this kiln does, while it doesn’t appear to bother the bisqueware, is hard on kiln furniture. A hearthplate lasts only one or two dozen firings, and here is what happened to a post that I used as a hearthplate stand for this rebuild:
In keeping with the above, after I had fired the kiln about 6 or 8 times I noticed that its behavior seemed to be changing. Firings were taking longer, and it took different gas pressure to reach the same level of reduction. When I had two firings in a row that were more than 100 minutes long I finally checked the flue, and discovered that its liner had collapsed and was almost completely blocking the opening.
I removed the remains of the liner, and abruptly found that in order to get the kiln into reduction with less than 27 psi of pressure from the propane tank, I had to block off more than half of the inlet of the blower on the burner. I resolved this by putting a small piece of fiberboard into the flue opening to block off perhaps 1/4 to 1/3 of it. I will probably be building new liners (the one on the inlet also fell apart), and we’ll see how long it takes to get used to whatever effect those have on the flame flow.
There are also, of course, optimal values for various adjustments of the burner. Needless to say, all of these parameters interact, something I probably failed to stress adequately in my Studio Potter article about this kiln and burner.
As of late April and early May, 2008 I am firing
in about 75 to 85 minutes, which tells me that I
do not have things fully optimized. Even so, I get
about 8 firings from a 40-lb propane tank, which
probably isn’t too terribly bad.
After I load the kiln and make sure I can see cones 9 and 10 through the spyhole, I put the lid on, position the burner, and preheat the kiln with a propane torch. When it reaches 150 or 160° C (which seems to take anywhere from 10 to 25 minutes, depending on conditions), I turn on the fan and bring the gas pressure on the main burner up to about six and a half PSI.
That starts the main burner, and I remove the propane torch. I also start the timer. The first few minutes of the firing are pretty busy:
At 02:30 I turn the gas up to 8 PSI.
At 05:00 I turn it up to 10 PSI.
At 07:30 I turn it up to 12 PSI.
At 10:00 I turn it up to 14 PSI.
If the firing is not going too rapidly, I turn it up to 16 PSI at 12:30.
When the temperature reaches a level that is roughly equivalent to cone 012 or 013 (see notes, below), I turn up the gas until I begin to see an appropriate reading on the automotive oxygen sensor in the chimney. This is tricky, for at least two reasons: first, at that point the sensor is just barely hot enough to produce a reading. Second, because the output of an automotive sensor varies wildly, I have connected a large capacitor in parallel with it. This makes it much easier to read, but also causes it to respond very sluggishly.
I usually have to bring the pressure up to at least 20 PSI to get any significant amount of reduction, and if I’m looking for moderate reduction it takes even more pressure. (Again, this also depends on the sizes of the ports and the way the burner is adjusted and positioned. It can be rather tweaky.)
After that I take readings every 5 minutes, noting the temperature, the gas pressure (which I rarely bother to change) and the reading of the oxy sensor (which decreases fairly steadily as the temperature in the kiln goes up).
When the kiln reaches about 1216-1220° C, I decrease the gas pressure until the reading from the oxygen sensor goes down into the stoichiometric range. It’s easy to tell when you are in this range: even with 20,000 μf across the meter it is not possible to get a firm reading, because the voltage swings are just too wide and too rapid. I do, though, usually try to get it to stay mostly in the 200-299 mV region unless I want a lean mixture, in which case I try to keep it in the 100-199 mV region.
When cone 10 touches its toes, I turn off the gas. By the time I get to the burner to pull it away from the inlet port (this takes a few seconds), the blower has filled the kiln with air. Various people have found that a period of oxidation at peak temperature seems to result in brighter colors, particularly with Rutile Blue and Copper Red glazes, so the little bit of air seems to be desirable.
I then block the port and cover the chimney. I also remove the oxygen sensor from the chimney, and insert a small plug in the hole that it normally occupies.
Because this kiln is so small, I can usually remove glaze test tiles about two or two and a half hours later, when the temperature has fallen to about 375° C. (If the glazes are going to craze I want to help them as much as possible, so I pull them when they are still rather hot, and air-cool them rapidly in the breeze.)
I usually prop the lid open just a bit at that point, or at least remove the blocks from the inlet port and chimney; within another hour or two the temperature has fallen below 250° C, and I can remove any actual pieces that I’ve fired.
First, I have never been able to make any sense of the notion of separate “glaze” and “body” reductions, at least in the high fire. If you are reducing, you are reducing; and the hot gas will reduce whatever it reaches. By the time the body has vitrified enough that its pores are mostly closed, the glaze has also melted, and further reduction of either is unlikely. (See the next item.)
Second, it is clear that unless you have a lot of hydrogen in the kiln, there is no real point in continuing to reduce after the glaze has melted enough to “skin over”. Doing so is just a waste of fuel. Yes, you can get a modest superficial effect; but if you have already reduced the glaze, what would that accomplish?
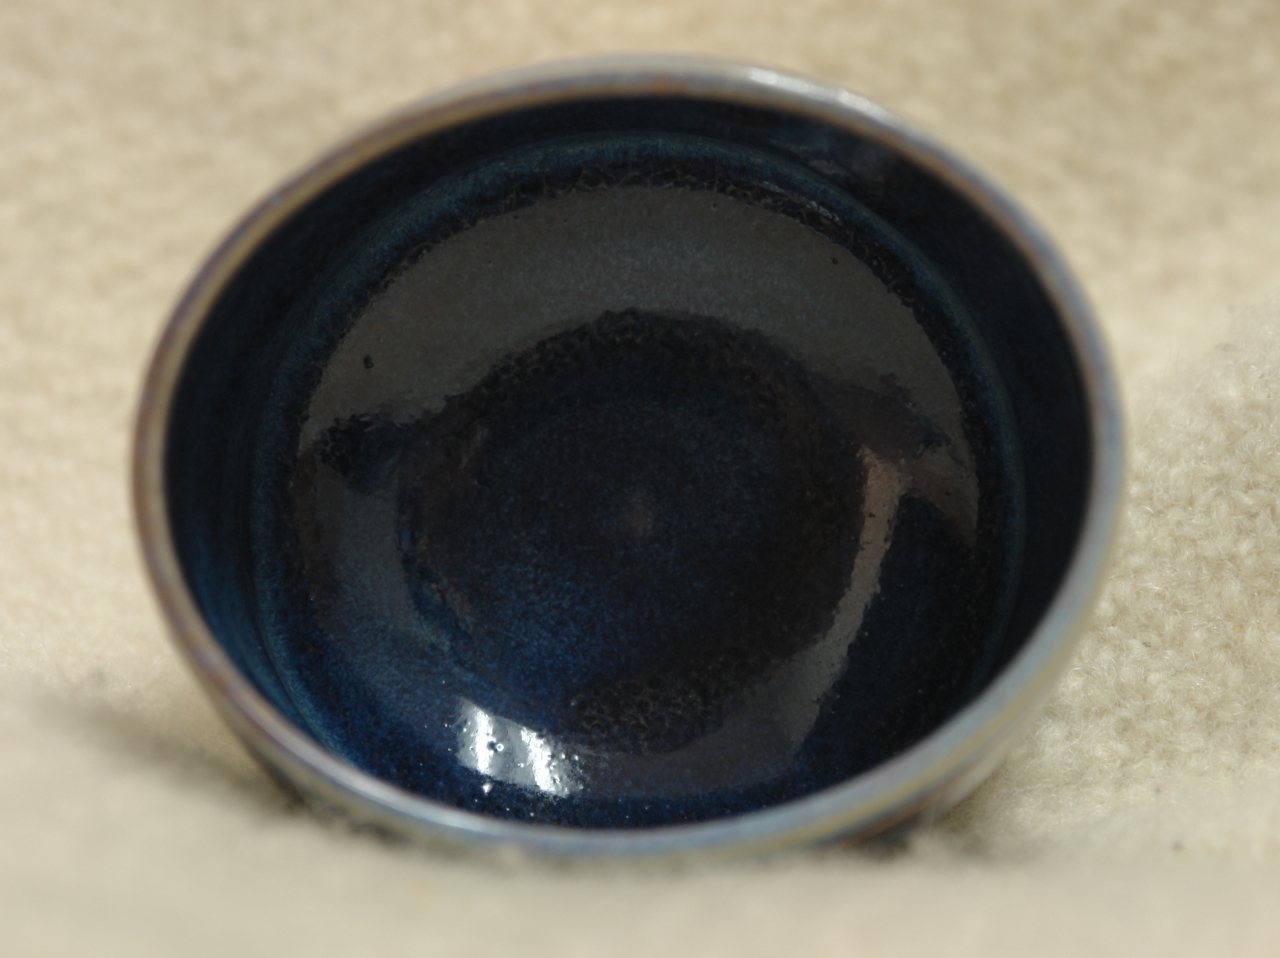
Third, I do not really understand the logic of alternating periods of reduction and oxidation. What are we trying to accomplish here? If you want to reduce the piece, reduce it. If you want to oxidize it, oxidize it. What do you expect to accomplish by doing both? (If you can answer this question, please email me!) I put the kiln into reduction at a reasonable temperature, and just leave it there until about cone 6, by which point the glaze is melted and the body is more or less vitrified. The results, I think, speak for themselves:

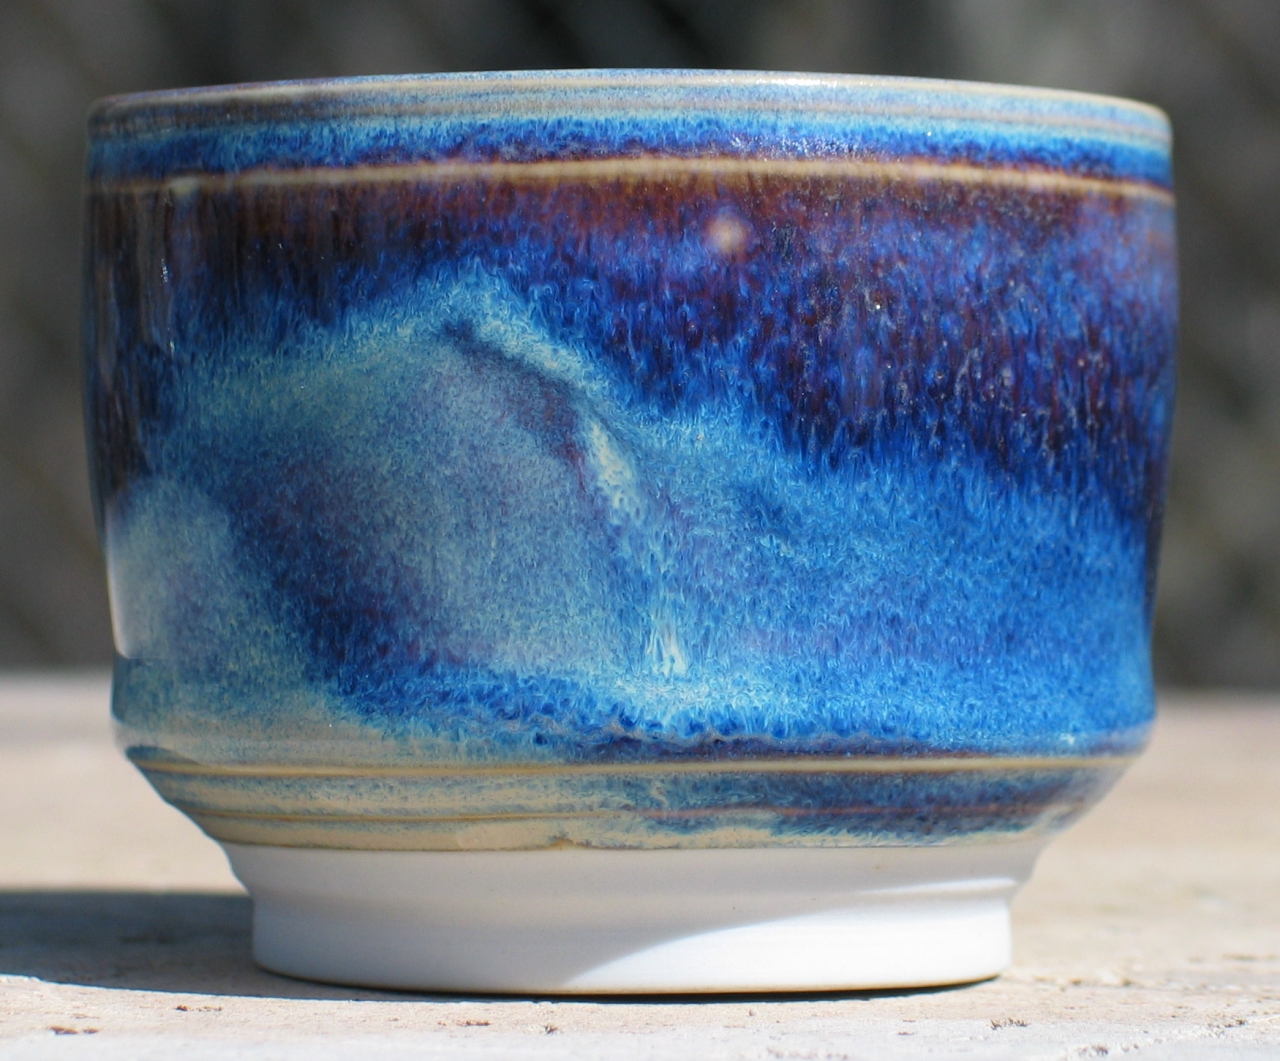
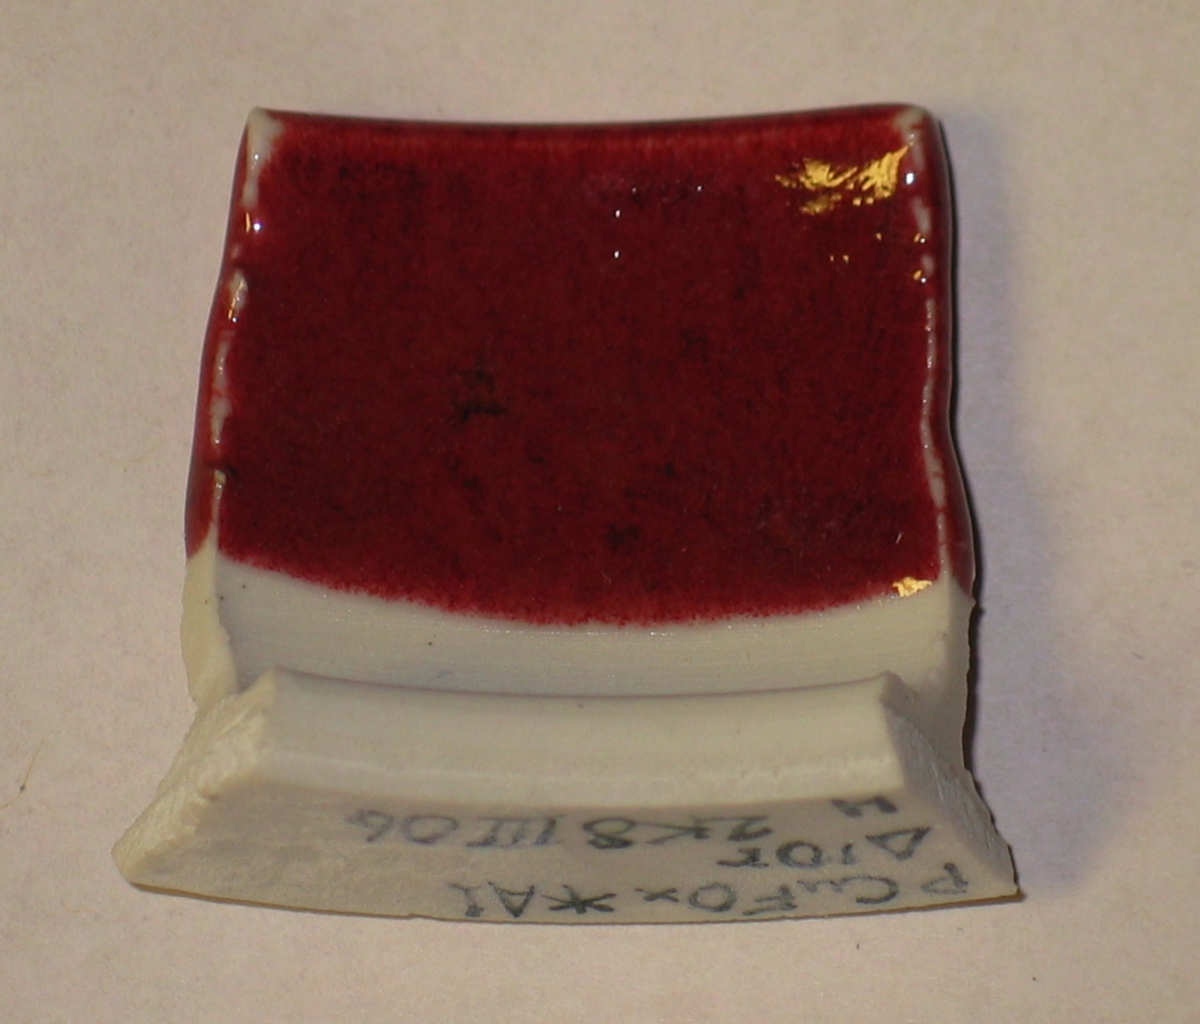
I should, perhaps, address the issue of what constitutes a reasonable temperature at which to initiate reduction. In this I take my lead from Pete Pinnell, who has done quite a bit of work with Copper Reds and is very articulate. He is also unafraid to try things, and has made lots of tests. Pete concludes that most people start reducing their reds a little late in the game, and he suggests that cone 012 is not at all too soon. (Tom Coleman, in his book of glazes, says that copper reds do well with early reduction, though he apparently tends to start only around cone 010.) As you can see from the photos, Rutile Blues are also comfortable with an early start.
I don’t really know where cone 012 occurs during my firings, because they go so rapidly (at 800° C, the temperature in the kiln is still rising at well over 1,000 degrees per hour), so I begin at a chosen temperature instead. When I was first getting used to the kiln I started reducing at 750° C; then I changed to 850, and now I am seriously thinking about going to 800 or even back to 750.
Fourth, I try to avoid reducing more than is necessary. For glazes that are colored only by iron, very little reduction is required. This is partly because Fe2O3 disproportionates on its own at elevated temperatures. For Rutile Blues and Copper Reds, OTOH, moderate reduction is required for reasonable color development, and I typically look for about 880 or 885 mV from the oxygen sensor when I put the kiln into reduction. I suspect that carbon-trapping shinos and a few other glazes may want even more, but I haven’t tried firing any of those yet. I have found, though, that I can fire reds and Rutile Blues and iron glazes together — the slightly higher amount of reduction does not seem to hurt the iron glaze colors.
Excessive reduction, on the other hand, can lead to
problems, and is a waste of fuel and money. A few tests
with different glaze types should let you know what kind
of reading you need to see on your setup in order to get
the results you’re looking for with a given glaze.
(13 February, 2010, late evening)
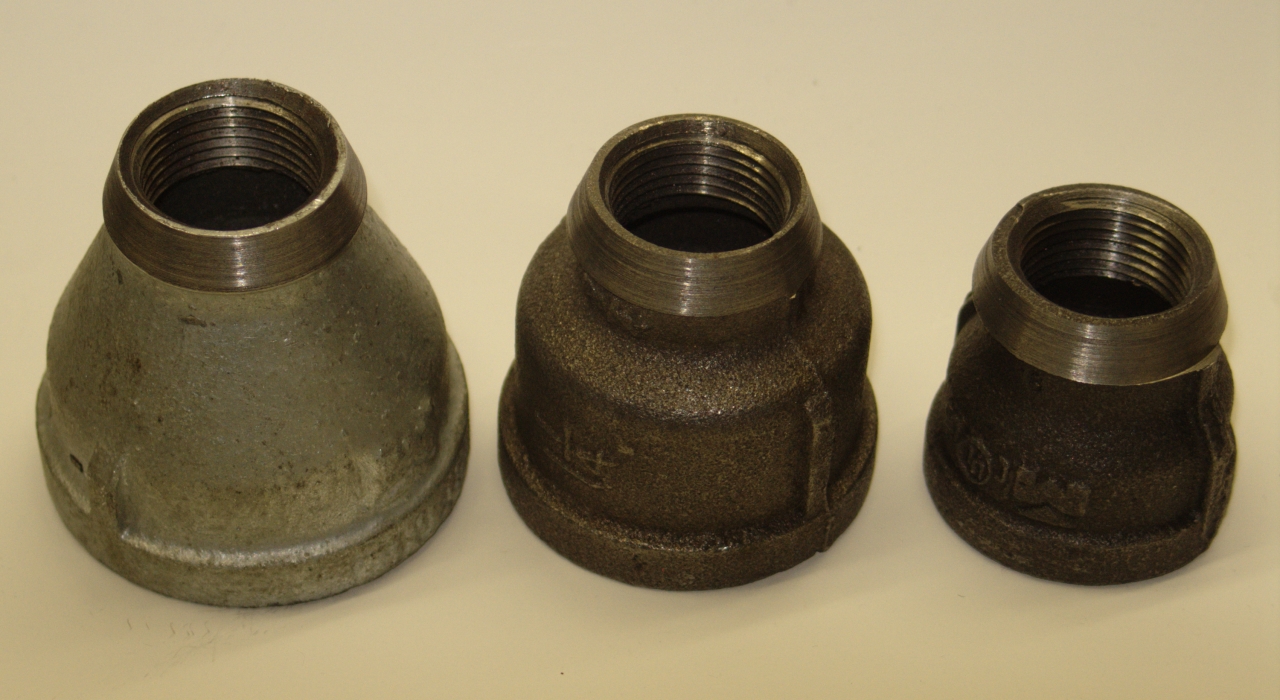
After some firings, the nozzle of the burner falls apart
and I have to replace it. The past 2 or 3 times this has
happened, I have tapered the inner end of the adapter
by hand, because I haven’t had access to a lathe.
This afternoon, Mike Nicewonger was kind enough to work
three adapters into shape for me. I have chosen three
different sizes, as it finally occurred to me that I
have never tried anything other than my original choice.
Once the weather warms up a bit I should be firing
the kiln again, and fairly soon the nozzle that is
currently on the burner will need to be replaced.
(They seem to be wearing out faster than they used to.)
At that point I will try to make some comparisons.
(15 May, 2010)
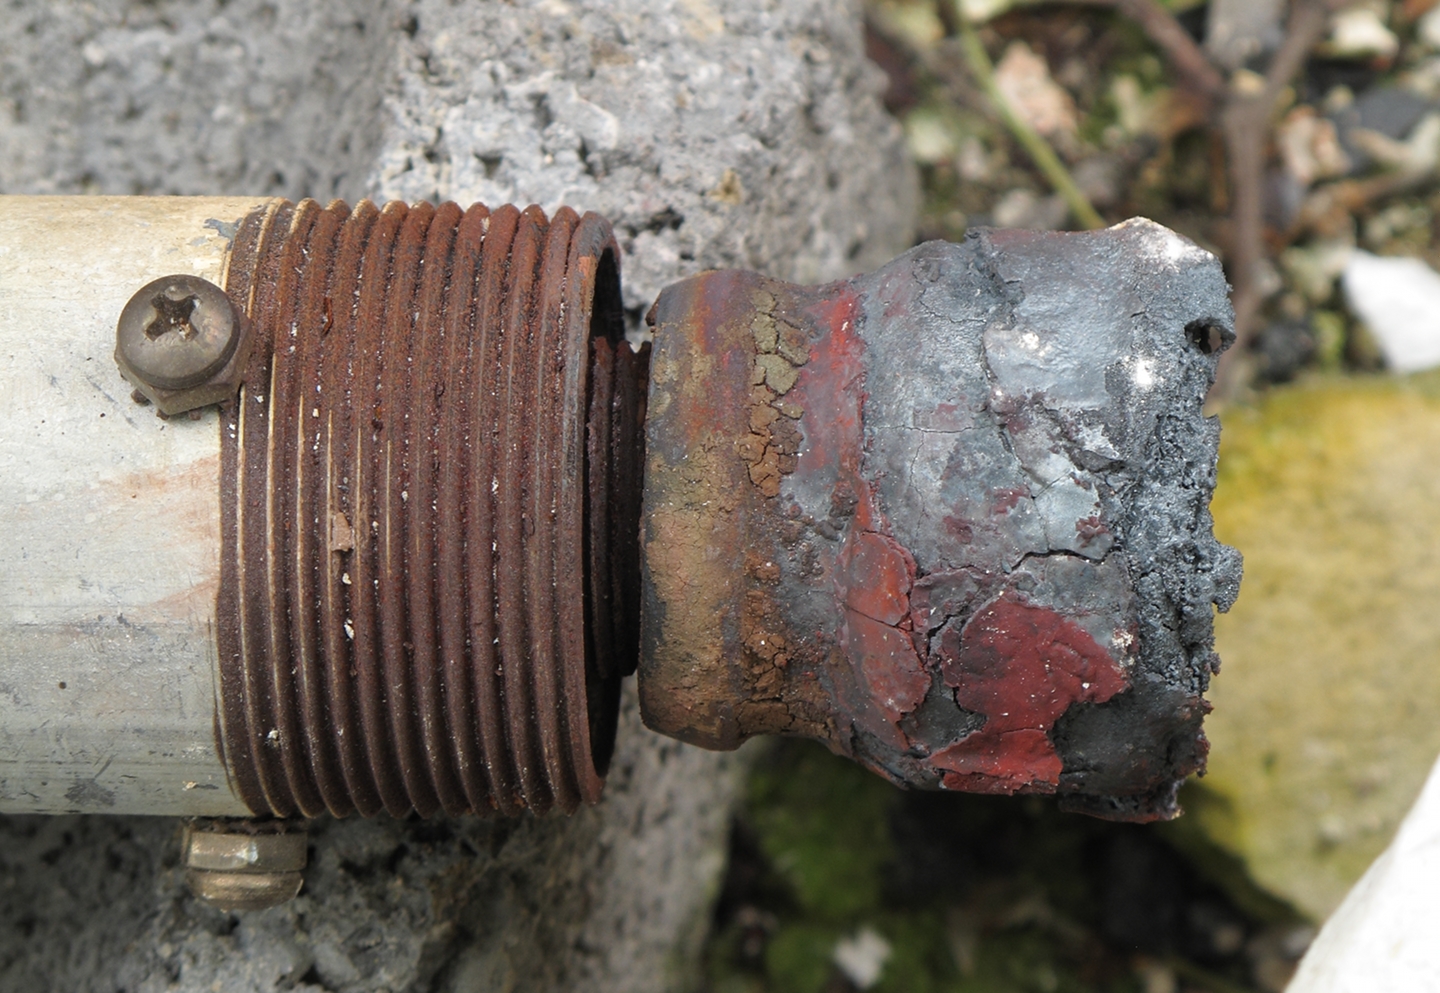
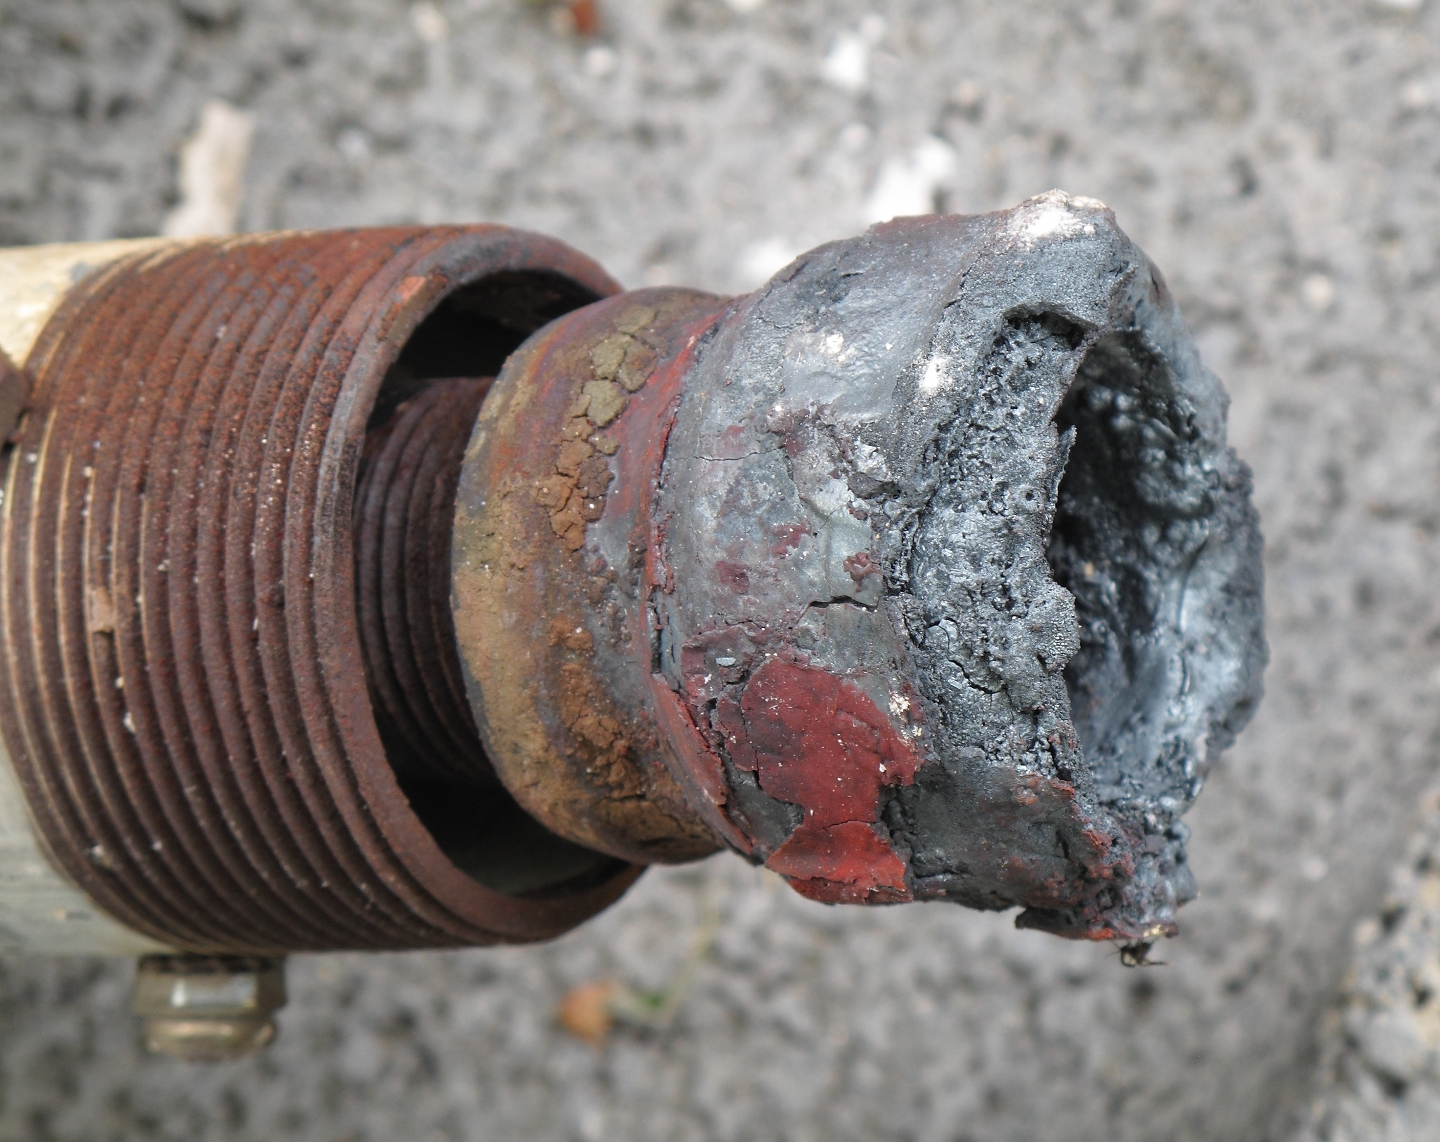
The weather has warmed up, and I just tried to fire the
kiln without replacing the nozzle. This appears to have
been a mistake; I aborted the firing after 90 minutes,
with the pyro reading 1036° C. (It should have gone
over 1000° by the 30 minute mark or slightly sooner.)
Here are two photos of the nozzle:
Now I get to decide which of the three new ones I will use...
(17 May, 2010, early AM)
I have not yet managed to remove the dead nozzle from
the pipe it was attached to, so I bought a new piece of
pipe. I used the smallest nozzle, which was the closest
match to the gruesome remains that you can see in the
photos above. I also unblocked the flue port just a bit,
as the piece of shelf that serves as a partial block (to
help control the flame) was a bit close to it. This
combined maneuver worked: with a very light load (6 test
tiles and a bowl), in extremely light reduction, the
kiln went to cone 10 at 1300° C in 71 minutes and 30
seconds.
More as it happens...
Back to
the first page of this set,
on which I describe converting the Paragon kiln to fire with gas.
On to the next stage, in which I
build a larger burner,
with the intention of converting a nice old Dyna-Kiln to use it.
Email: a@b.com, where you can replace a with my first name
(only 3 letters, just jon, no “h”) and b with joss.
Phone: +1 240 604 4495.
Last modified: Sun Feb 17 00:25:13 EST 2013
Nozzle Update
the Joss Research Institute
19 Main St.
Laurel MD 20707-4303 USA
Contact Information: